Monday, January 28, 2013

Ace of Baseboard

Check out these photos (taken sometime in October or November) of our bedroom.  Notice anything weird about them?


I mean, other than the cords hanging all over the place...


...and the fact that I didn't move the box fan, and that there's a giant old-school TV in there.  But other than all that stuff.  Notice anything strange?


That's right-- there aren't any baseboards in there.  You can see a faint line on the wall where they used to be, but they ain't there no more.  There aren't any in the second bedroom either.  We're guessing that at some point a previous owner installed baseboard heating (you can also see its imprint on the east wall of the master) in the bedrooms and used the woodstove to heat the living room.  (I'm not 100% sure why adding baseboard heat to one wall necessitated the removal of all the baseboards in the room, but whatever). And then the next owner did us a solid and got a furnace and put in some ductwork and removed the baseboard heaters.

Call me traditional, but I feel like a bedroom needs baseboards.  Every time I walked into the master I kind of felt like I'd caught it with its zipper down or something.  Like, I'd walked in on it getting dressed.  I don't know.  Anyhow, we replaced them on Sunday.

Here's what it looked like after we pried off the paint-splattered quarter-round:


Then we spent a truly hilarious hour cutting all of our boards to length (and to their proper 45° angles, of course).  You see, it was raining (duh) so we didn't want to go outside and use our circular saw, and that meant we had to rely on our little miter box.  Unfortunately we were unable to photograph all the insanity that ensued as we tried to 1) hold long pieces of molding level, 2) brace the miter box so it wouldn't move, 3) keep the molding pressed tightly against the back of the miter box, and 4) actually saw through the stuff-- I'm sure there's an easier way, but we prefer to make things complicated here.  Cuts done, we construction-adhesived and finish-nailed the molding to the walls.

Today I caulked all of the seams, and when the caulk cures I'll give it a nice glossy coat of trim paint.  And then I'll have better photos.  See, I'm concurrently in the middle of another project whose results I'll reveal by the end of the week, and maybe by then I'll have the wherewithal to find the actual camera instead of relying on blurry iPhone photos.  Til then, here's a crappy shot I took to text my mom in Virginia so I could show her our progress.  It's Ray nailing in the molding on the wall behind the headboard, and you can see some finished (well, except for the paint) work in the background:


Anyway, better photos to come.  And once I've painted it and picked up some new curtains and curtain hardware, the master bedroom will be finished.  At least until I decide I want to paint it again.  

And hey y'all, thanks for your endless patience with my lack of photography skills.  It IS endless, right?


Friday, January 25, 2013

Friday Morning Update

I've been feeling weird about hanging art in the bedroom ever since we removed the strange cabinet-thing and it took me a million years to get the walls patched properly.  It's like I don't want to make extraneous nail holes in my beautiful patch job.  But I woke up this morning and I decided I needed to just get something done, and so I did this:


Do excuse the natural Pacific Northwest lighting, as always.  We live in a state of perpetual twilight.  Also, the sheet-- I know it's hanging out under the scalloped edge of the quilt.  But I'm not perfect and this blog is about REAL TALK, people.  

Anyhow, what you're looking at is three of my favorite pieces of art, newly hung in the corner where the gross cabinet used to be.  Let's examine:


Over my nightstand: it's really hard to see in this photo, but this is an old portrait of King Charles II as a child.  In real life, you can see that his two spaniels (Cavalier King Charles, naturally) are at his side.  According to my grandmother, her mother purchased this in New York at some point in the twenties or thirties, but nobody really knows how old it is or where it came from.  It seems to be a reproduction, though there are dimensional brushstrokes on it.  I like it because it's kind of dark and mysterious and has some family history, but it's also a painting of a cute kid and some dogs.  Win-win.

The top painting in the gold frame on the window wall is also really special to me.  The same great-grandmother who bought Charles II's portrait was also an accomplished painter.  She painted this view of the gates of the Country Club of Virginia at some point in the fifties.  As it happens, she didn't care for the painting, and she never finished it.  If you look closely between the red-flowering tree and the left-hand brick pillar, you'll see it's blank canvas with just the rough undersketch of the fence she was going to paint there.  I'm not sure why I find its unfinished-ness so appealing.  I just do.  Plus it's a beautiful painting of a place I grew up seeing.  Win-win-win.

Finally, the bottom painting is one of my favorite things in the entire world.  It's the boathouse at my family's place on the Chesapeake Bay.  Ray and I were married on the lawn of that house, and my view during the ceremony was pretty much that exact view of the boathouse.  This painting was done years before the wedding by my friend Hunter.  In college (or maybe right after?) my best friends and I had gone to spend a weekend at the house, and Hunter, who is obviously a very talented painter, set up an easel on the dock and painted this en plein air on a Saturday morning.  It reminds me of so many things: being young and silly with my friends, my favorite place anywhere ever, my family, my home.  AND it's beautiful.  AND it was painted by one of my all-time favorite people.  Win-win-win-win.


Boy, from this angle Charles II just looks like a solid-black piece of canvas in a gold frame-- maybe he needs to be cleaned.  

Anyhow, there's more art to hang in here, plus curtains to replace and baseboards to install, but we're making progress.  Also, side note: I like those pillows on the bed MUCH better when the flame-stitching is vertical on one and horizontal on the other.  I don't know why.  Thoughts on asymmetrical throw pillows? 

Sunday, January 20, 2013

One Down, Seven To Go

BREAKING NEWS: we have finally completely finished one room in the house.  The living room is done!  Today we stained and attached quarter round to trim our new slate fireplace hearth.  While we were at it, we scored a pretty handsome (and very inexpensive, I might add) fireplace screen and some new fire tools from Target.  And now we are done.  Please admire:


And the obligatory detail shot:


Now we'll take a quick look back through the various phases of transformation.  First, here's what we saw the first time we ever saw the house in June 2012:


Yeah.  Before we closed, the woodstove was removed (first off, we didn't want it for obvious reasons-- i.e., it was hideous-- and second, it was not certified so our lender required it to be out before closing). Here's what it looked like as my dad pried up the huge tile pad one week post-closing:


The removal of the giant tile pad left us with some scarred-up hardwood flooring and a bare concrete pad.  About a month later, I made a mixture of 1/2 Behr Ultra Pure White (our trim color) and 1/2 Behr Irish Mist (the wall color in the living and dining rooms) and painted the brick:


 Sorry about the blurriness-- at that point I was even more pathetic with the camera than I am now.  The next shot really shows off the damaged hardwood we were left with when the tile pad was removed:

 
Next step: refinishing the floor.  We went from here (don't mind me cheesin' and looking HORRIBLE in this photo, okay?):


To here:


And then we bought some slate:


And laid it.  And today, we finished the project.  Which means we went from here:


To here:


...in about five months (which is nothing to be proud of, but hey-- we work full time and we've done plenty of side projects in the meantime) and for a total cost of around $100.  

And now it's time for a breakdown (10 points to the first commenter who can correctly identify the 90's song I just obnoxiously quoted):

Removal of woodstove: FREE to us (thanks to our amazing realtor)
Removal of tile pad: FREE
Paint for brick: FREE  
(sample of Ultra Pure White in flat finish left over from our trim-color decision + leftover Irish Mist from living room paint job)
Leveling compound for hearth: $14
Tile for hearth: $66 including shipping
Thinset for hearth: $20
Stain for floor and quarter-round: $5
Quarter-round: $5

GRAND TOTAL:  $110

  I'll take it.  Just seven rooms left until we're done!  Hahahahahahahhahahahahahahahah.


Friday, January 18, 2013

Win Some, Lose Some: Decor Edition

This post begins back in December in Richmond, VA, when I dragged my husband into U-fab.  If you read YHL (and you do, obviously) then you're familiar with U-fab, and I thought I'd take the opportunity afforded me by the Transcontinental Christmas Tour to stop in and check it out.  A staff full of hipstery girls and cute fabrics = my kind of scene, so I couldn't leave without buying a yard of this cool greige ikatty stuff:   


 ...even though I was literally thousands of miles away from my house and had been for nearly a month.  I thought it might look cool with my rug due to the orange / cornflower connections.  But I got back here with it and it quickly became obvious that this fabric is freaking hideous with my rug.  Like, SO bad.  

But still and all, I really like it.  So I decided to turn it into a window treatment for the bathroom.  

[I know, I know, the bathroom.  It's all I ever talk about.  Bathroom, bathroom, bathroom.  Sorry-- we all have our flaws, no?]

I only had a yard of the stuff, so I went for the faux-roman shade look that you've already seen on every blog you read.  I decided to line it and hem it nicely in an attempt to make it look a little less homemade.  Two sewing machines later (the first one shat the bed about halfway through the project, but that's a story for another day / several more cocktails), I ended up with something that, on its own, is pretty cute.  But it is SO DAMN UGLY in my bathroom that I can't even bear to post a photo.  And I guess it's okay because the total investment on the project was, like $12 (one yard of fabric-- I already had everything else I needed) and probably two hours of sewing / hemming / pinning / stapling the fabric to the 1" x 2" pine I was going to use to attach it to the wall).  But still, I hate failure.  At the moment I'm contemplating ordering a couple more yards from Fabric.com and making two more to match the first, all of which I could then use on the three windows in the kitchen.  I don't know.

But as any Bradley Cooper / Jennifer Lawrence romantic comedy would tell you, every playbook cloud has a silver lining.  (Too early for Oscar jokes?)  And mine was a nice sunny day.  Well, it wasn't sunny, but it wasn't pitch-dark.  Do you know what that means, dear readers?

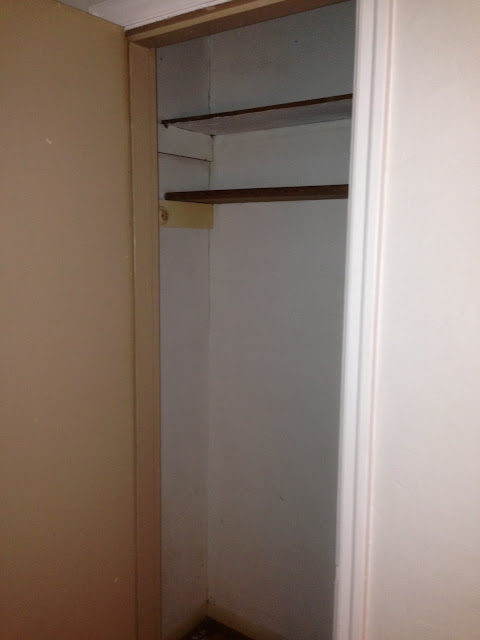
CLOSET PHOTOS!  Not one but TWO passable closet photos:


And a close-up that doesn't involve Ray's soccer and running shoes:


 Still have a bit o' staging to do in there but when it's winter in Oregon you have to strike while the light is good.


Sunday, January 13, 2013

The Epic Saga Of The Entry Closet

I thought when I started the entry closet project that it would take, like, three hours and then I could do a nice fatty gratifying blog post with a major (if not earth-shatteringly important) before-and-after.  But, like so many things in life, that is not at all what happened.  Here's a quick timeline of the closet project, followed by a disappointing "after" photo.  I'll explain that later.

Friday, January 4:
I return to Oregon following our epic national tour, and I decide to paint the inside of the entry closet.  This'll take no time at all, right?  I spend the evening looking at entry-closet makeovers on the Internet and struggle to stay awake until 9pm-- I'm still on East Coast time.

Saturday, January 5:
I wake up at the crack of dawn (East Coast time again) and make a plan.  I'll take the two shelves out of the closet and clean everything thoroughly, then I'll give everything a quick coat of primer (I'm pretty sure the walls have never been painted, and the supershiny barf-colored trim paint might be oil-based).  Then I'll be ready to hit the Home Depot when it opens-- I'm out of trim paint and I need to pick out a color for the walls.

So I try to remove the shelves.  For four hours.  They are wedged in so tightly that there is no possible way to coax them out.  At one point I manage to finagle the bottom shelf so it's now on top of the top shelves.  [I still have NO IDEA how I did that-- I somehow crossed the upper ledger board?]  I'm sweaty and I've swallowed a lot of the old gross dust that's been falling down while I attempt to wrangle the shelves.  I bang on them with a hammer.  I contemplate sawing through them, but they're pretty sturdy and I know that'll take a million years.  At noon, I give up and start priming the back of the door and the trim.  When I finish an hour later, I try to unwedge the shelves again.  Not happening.  So I start priming around them.  It is not efficient.

By bedtime I've succeeded in doing nothing but forcing the shelves into a crazy configuration-- they are all suspended well above the ledger boards at weird angles.  [I now wish I'd taken some pictures, but at the time I felt too stupid to break out the camera.]

Sunday, January 6:
I wake up and decide that-- even though I think it will be entirely pointless-- I'll have to try pulling the ledger boards off the walls so I can maybe angle the shelves enough to remove them.  Miraculously, after removing just one ledger board, I'm able to yank them all out within thirty seconds.  I prime all around where I wasn't able to while the shelves were stuck inside, then I head to the Home Depot and pick up my trim paint and get some samples of peacock-blue paint.

I finish out the day by first-coating all the trim and the tops of each shelf.  I paint big squares of two different peacock blues on the wall.  I pick one.  Now we're getting somewhere.

Monday, January 7:
First day of a new semester.  I bounce stumble out of bed at 6am and spend the day edifying the next generation.  When I get home at 2:30 I change into my paint clothes and second-coat the trim.  This is taking a lot longer than I thought.

Tuesday, January 8:
After teaching a full day, I go back to the Home Depot to get a quart of peacock blue.  Our town has recently banned plastic bags and paper bags cost a nickel, and of COURSE I've forgotten my reusable shopping bags, so I struggle to carry my freshly-mixed paint, a new roller head, and a little mini-roller (I've always wanted one) to the car.  While I fish for my keys in my pocket, I drop something in the parking lot.  Is it is the roller head?  Nope.  The mini-roller?  Not a chance.  It's the quart of peacock-blue paint and IT. GOES. EVERYWHERE.  The nice people in the Home Depot assure me that this "happens all the time."  Right.  They mix me another quart of paint.  Thanks you guys.

I get home and first-coat the closet.  The paint vanishes into the walls immediately.  Argh.

Wednesday, January Jones 9:
I second-coat the closet walls and third-coat the trim after teaching, and I once again watch the paint disappear upon application.  I'm starting to tire of staring at the entire contents of the closet, which are spread around between the living room, dining room, and guest bedroom.  Why is this taking so long?

Thursday, January 10:
I give myself the day off.  I get home from work and pass out facedown on my unmade bed.  Later we meet some friends out for drinks.  It's nice to get out of the closet.

Friday, January 11:
I have a long meeting in the morning and spend the rest of the afternoon writing recommendation letters for various students.  Get home and second-coat the tops of the shelves.  Meet another group of friends for drinks in the evening.

Saturday, January 12:
After third-coating the closet, I'm relieved to see that no further coats will be required.  I stain the closet bar and replace the shelves, which fortunately are easier to install than to remove.  I hammer the ledger board back into place.  After waiting for everything to dry, I realize it's much too dark to photograph the results.  Not because it's late, but because it's winter in Oregon.  There is no such thing as sunshine.

Sunday, January 13:
Still no light to take a good photo, so I settle for this absolutely dreadful one instead:


Despite that fact that this is an awful photo, I'm really pleased with the final result in the closet.  I need to pick up some nice wooden hangers and stage the whole thing, and someday when the sun returns to the Pacific Northwest I'll take a few real photos and post them.  So expect to see that in, like, July.

In this shot I took before I reassembled the whole thing, you can see the little sliver of color from the sofa:


And a little reminder of where we started:


Eeeeeeew.


Saturday, January 12, 2013

Our Dirty Enormous Secret

So far on the blog you've mostly seen our public spaces-- the living and dining rooms, bathroom, and master bedroom were the first things we wanted to tackle when we moved in because they're the places where we spend most of our time.  It's felt like slow going, but we're constantly amazed at how different those rooms look-- they've all been painted, the living room had a major fireplace / hearth makeover, the bathroom got a new vanity and mirror and baseboards and hardware (and lost its soffit), and in the master bedroom we've changed the closet doorknobs and the ceiling fixture and also ripped out a weird doorless cabinet.

But now, with the entry closet / distraction project in its final stages (just waiting for the paint on the top shelf to dry before we can pop it back in), we've been thinking a lot about where to go next.  And we're thinking it's time to tackle the Dreaded Third Bedroom.  


So far I've carefully avoided showing any photos of the third bedroom because it is just. so. ugly.  I mean it is UGLY.  Don't believe me?  Well, here you go:


Yeeeeaah.  So.  

The third bedroom was once our house's garage until some enterprising former owner decided to "finish" it.  It's accessed via the laundry room, which is off the kitchen, so the first major issue with the third bedroom is that it's kind of in a no-man's land.  At the moment, its location is a point against it-- it's all the way across the house from the other bedrooms and there's no bathroom nearby-- but we have big plans for this baby.

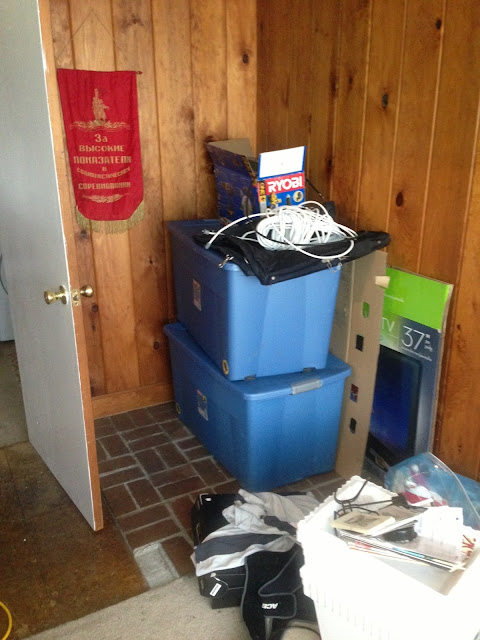
But before we get to all that, let's talk a little more about its major malfunctions.  First and foremost, its biggest downside is that it looks nothing like any of the other rooms in the house.  It's kind of like two different houses-- one cute 40's bungalow and one butt-ugly 70's basement-- are spliced together.  The third bedroom has paneling and carpet and acoustical tile where the rest of the house has plaster and hardwood and coved ceilings.  Second, at the moment it's completely useless as a bedroom-- those paneled walls aren't even insulated.  Third, it's not a huge space-- I'm estimating maybe 12' x 14'-- so it's not quite big enough to serve as a combination queen-bed guest room and office.  And as you can see, at the moment we're using it as a storage / junk room.   Here's a view through the laundry room (where I'm drying some of Ray's flannel shirts) and into the kitchen (where the closet shelves are drying):


See that uncarpeted square in front of the door?  That's pressboard tile.  Oh, you've never heard of that?  Me neither!  It's under the carpet too, and it's not even glued down, so when you walk on the carpet you sort of squish around.  So weird.  And there's also this:

 
See that brick pad on the floor there?  When we first looked at the house there was-- no joke-- a red chimenea sitting on it.  The chimenea was illegally installed and not vented to the outside, so it was removed as a condition of closing.  We were not sad to see it go.

So why tackle this room now?  

First off, this is a part of the house that we're not using at all, and that makes it a good candidate for a reno for three reasons:

1. If it takes us forever to get it done while we work full-time, that's okay-- at the end of a weekend of reno we can just shut the door and forget about it during the work week.

2. We'd like to be able to use it as an office, and while we're not currently planning to add to our family, we'll need a guest room if we do. 

3. We've thought since the minute we first saw that house that fixing the third bedroom would be a really important update for resale purposes.  If we can't use the space, neither will the next owners, and we don't want to give future buyers any excuse to not love the hell out of this place.  It's a decent-sized chuck of our square footage, and it needs to be be an attractive selling feature despite its odd location in the house.

Another reason we're eyeing this space right now: of all the major renos we need to do (kitchen, rest of bathroom, laundry room), this should be the cheapest, easiest, and most DIY-friendly.  We don't need to move or add any plumbing or electrical or HVAC, and not a lot of finesse is going to be involved.  We're not naive enough to think it's going to go 100% smoothly, but we feel like we can handle most of the work on our project list:

PHASE ONE:  DEMO
We'll rent a Dumpster and remove every surface in the room.  Gone will be the paneling, the acoustical tile ceilings, the filthy carpet, the brick pad that once supported the chimenea, and the pressboard tile floors.  To be honest, this is the only phase that worries me-- if the ceiling tiles turn out to contain asbestos, we'll have to put the whole project on hold because we don't have the extra scratch to pay a pro for asbestos remediation at the moment.  And we'll probably have to have our first jackhammering experience in order to get the brick pad up.  And I can't even imagine what sort of fresh hell is probably hiding behind that paneling.  But we'll get it done.  Right?  Won't we?

PHASE TWO: INSULATE & PREP
Walls and ceiling will both get some new insulation so the place feels less like the inside of a freezer.  The floor will likely need to be leveled.  Fun times.

PHASE THREE: PUT 'ER BACK TOGETHER
Sheetrocking shouldn't be a huge hassle in here-- the ceilings are fairly low and we should be able to drywall them without renting a drywall elevator.  We'll be dealing with big sheets of drywall that have nice factory edges for once, so the taping and mudding will be manageable.  We'll trim the windows and doors with the same kind of millwork that's in the rest of the house.  We'll use peel-and-stick faux hardwood or laminate (whatever we can find to closely approximate the oak in the rest of the house) on the floors and finish them with nice baseboard.

Not sure when we'll get started, but I'll keep you posted.  In the meantime, here's a teaser shot of the entry closet in all its peacock-blue glory:


More on that tomorrow.

Monday, January 7, 2013

Trapped In The Closet

Do you love R. Kelly like I love R. Kelly?  Okay, well, I don't really love R. Kelly (though I do have some very fond Remix-To-Ignition memories circa 2002-2003) but this was the first post title that popped into my head so I went with it.

We are finally home from our long trip, and we're so happy to be back in our sweet little house.  We really, really missed it.  And we were also pleasantly surprised when we walked in and realized that the bathroom wall patch actually looks MUCH better than we remembered it looking-- over the past three weeks, it had morphed in my head from not-100%-perfect to absolutely horrible, and when I saw it again in person, I paused to literally pat myself on the back.  Okay, so there are a few places where I'm going to have to sand the enormous chunks of rogue orange-peel texture off, but all in all I'm really proud of what I did.  It required like 37 pieces of drywall and nothing was level, and I had NO factory drywall edges to work with, and given all that the end result looks pretty professional if I do say so myself.  And all my fears about the slate hearth looking awful were allayed.  I'm stupid.  Nobody else would ever in a million years see the tiny flaw that's been keeping me up all night.  So I guess sometimes you need to get away to realize that you're actually doing a good job and all your hard work is paying off.  Phew.

When I walked through the front door (for the first time in nearly a month!) on Friday, I had already half-formulated a plan for a nice little side project: the entry closet.  It's getting an interior paint job as part of The Year Of Living Colorfully-- I'll never commit to bright colors on the walls (I've seen a few too many episodes of House Hunters to fall into THAT trap) but I thought maybe I could handle one bright closet.  And the entry closet was in sad shape.

All the trim inside every closet in this house was the same color when we moved in.  I don't know exactly how to describe it, but I'd like to think the paint chip was probably labeled BABY VOMIT.  For your viewing pleasure:

  
Anyhow, you can see it has some good features-- it's a decent size and it has two very handy shelves resting on ledger boards; I'd already removed the closet bar when I took this photo but it's nice and sturdy-- but it is also utterly filthy and hideous.  The drywall was unpainted and had sixty-odd years of stains from muddy boots and God-knows-what.  The trim was a lovely shade of barf, the shelves are half-painted white, one of the ledger boards was yellow (why?).  And this leads us to yet another one of my neuroses / weird fantasies, which is  that someone really important is going to come over (like the university President or the actual President, who has some family in our town, or maybe the Queen of England because I don't know why) and I'm going to have to open the entry closet in front of this person ("Your Majesty!  May I hang up your jaunty Phillip Treacy hat?") and he/she is going to be horrified.  

That's the kind of thing that keeps me awake at night, no lie.

So I decided to paint the woodwork in there to match the rest of the trim in the house (off-the-shelf Behr Ultra Pure White) and then I went crazy and bought some peacock blue for the walls.  I thought it might complement the pops of peacock in the rug:


At present there's one coat of primer and one coat of trim paint on everything, and I've cut in with the blue.  Not too shabby considering today was the first day of a new term and I'm teaching four classes.  Next up: staining the natural-wood closet bar dark (saw this on someone's design blog ages ago and it really looked sharp), rolling the walls with peacock blue, second-coating the trim and shelves with glossy white, buying some nice matching wooden hangers, and photographing the closet for the big reveal! 

Wednesday, January 2, 2013

New Year, New Projects

Hi all!  Still traveling, so not much to report in the way of actual progress.  But I thought I'd make a little list of things I want to do to our little abode in 2013.  House resolutions, if you will:


1.  Trim the hearth.  

We laid the slate on the hearth before we left on our whirlwind US tour in early December.  We'd decided not to grout since we couldn't find any small containers of premixed dark gray grout, and I kind of wanted the seamless look of one big slab 'o' slate rather than four individual tiles.  Nobody told me that the purpose of grout is to hide one's less-than-perfect joints, and I kind of wish I'd thought of that because there's one place where a wee bit of thinset oozed up between two of the tiles and-- since there's no grout to cover it-- there's a milimeter-wide white stripe there.  We tried to pick up the tile and replace it as soon as we noticed, but it was already too late.  I was so disappointed in my tile-laying skillz that I cried hysterically for what may or may not have been several hours-- I reallyreallyreally wanted it to be perfect.


I'm not sure if this is something anyone else would notice.  Here's a photo, and you can tell me if you see it:


In any case, I guess this one comes with a bonus personal resolution: try not to become entirely distraught when things don't go exactly, perfectly, 100% according to plan.*


Anyhow, now it's just waiting for us to stain some quarter-round and attach it.  Then we can move on to other posts not related to the fireplace and the bathroom.  Yay!


2.  Invest in an awesome sofa.

This, I think, in slate-gray velvet:


There are a lot of reasons to love this baby from clubfurniture.com:  


First, it's so pretty.  Clean midcentury lines, low skinny arms, nice slim legs, button-tufted back-- please stop, you're KILLING me!  


Second, that chaise is REVERSIBLE.  Yes.  That's what I said.  You can SWITCH it from one side to the other because this baby is actually two separate pieces of furniture-- a sofa and an ottoman-- and it comes with a separate ottoman cushion and separate sofa cushion so you can use it as a plain ol' sofa + ottoman combo.  And they also give you the chaise cushion so you can use it as a sectional.  This basically solves every problem I've ever had in my entire life.  Okay, not really, but kind of.


Third, I would feel weird about buying a sofa from the internet, but my mom's sofas came from clubfurniture.com and they are probably the most comfortable couches EVER.  I literally cannot sit down on them without falling asleep.  Who'd have thought my mom would be on the vanguard of ordering furniture from the internet like ten years ago?  


Fourth, our old sofa is gross and it just needs to get out of my life immediately. I'm guessing it was actually manufactured in the sixties and I inherited it from a family friend when I was in college.  For a hand-me-down it's served me well-- usually when people inherit sofas they're overstuffed and upholstered in green Naugahyde.  But anyway, it's falling all to pieces, and it's too small for us and our gigantic living room, and it's brown.  I'm so over brown. 


3.  And a new chair (or learn to reupholster the one I've got).

Love the West Elm Everett chair in this stripe:


And I think it plays well with my sofa in both scale and general aesthetics.  But I may wind up attempting to re-cover my own.  This all depends on how ambitious I can force myself to be while suffering through another gray rainy Oregon winter.  And I'd love to be the kind of girl who finds some amazing Eames / Mies van der Rohe / Saarinen type of chair in a thrift store and reupholsters it like all those obnoxiously cool people on design*sponge but I also think it's also important to be honest with yourself and realize that that's just not who you are.  You know?


4.  Make some throw pillows.

My mom is the queen of this.  I mean DAMN she is good.  She's going to teach me how to make self-cording tomorrow.  Is it sad that I'm thirty-one and don't know how to make self-cording?  Maybe.  Anyhow, here's some fabric I bought:


It's cream, orange, and cornflower blue on a pale-gray background; the colors didn't quite come out right in this iPad photo.  Anyhow, I'm hoping to also find some solid orange or some navy-and-teal patterned something or other to use too.  It's going to be bad-ass with my rug, right?  


5.  Take some risks.

This seems like a good place to admit that I have major design fear.  I love looking at slightly kooky spaces in shelter magazines and on design blogs, yet my own house is just a sad cycle of gray-beige-greige-gray-beige-greige.  I love bright colors, but I can't commit to them.  So 2013 will be the Year of Living Colorfully, in which I will force myself to buy / make / RIT dye all those crazy things I'm so jealous of in other people's houses.  I'm just going to go for it.  And if my house winds up looking like a crazy person decorated it, well, I have plenty of neutrals to fall back on.


Some of these sub-projects include (but are not limited to):

a. find / make incredible Hermes-orange patterned shower curtain and find fun complimentary fabric for dummy Roman shade in bathroom
b. paint guest room some color that is not greige, or, if greige, at least a sort of BOLD greige
c. stencil enormous jute rug (see the Young House Love book for more on this, and more on all things awesome) that I bought and was then forever stuck with so I can use it as my "summer" rug and not have wasted $165 on something I hate, hate, hate.


4.  Find out who you people are, because I love you for reading about my house.

Leave me a comment and let me know all about you!


Happy New Year y'all!


*impossible.