Showing posts with label Before and After. Show all posts

Monday, October 28, 2013

Windows Trimmed

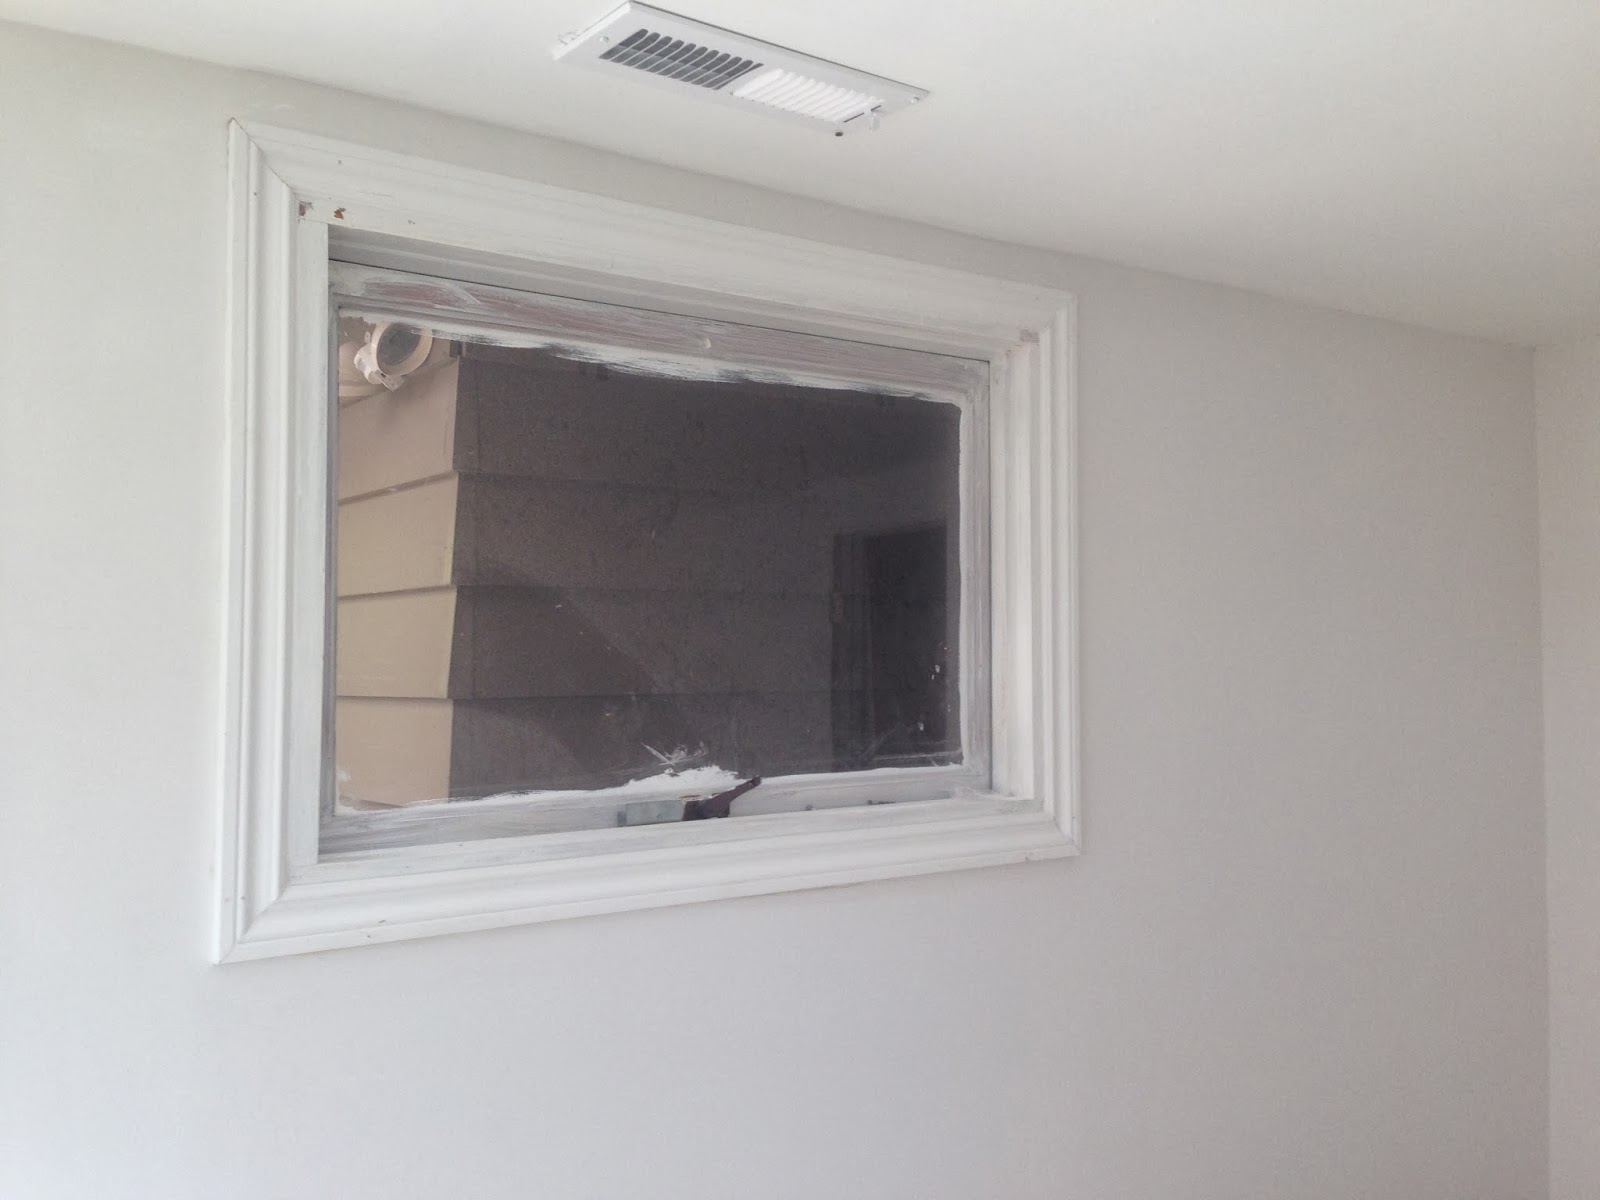
Too tired to think of a sexy post title.  Here are some photos of the windows post-trim and two coats of glossy white paint:


Funny how different the wall color looks in two photos taken of two different walls at the same time!

The door's all trimmed too.  No photos.  Bad blogger.  Sleeeeeep.


Sunday, October 20, 2013

Feet on the Floor

So, we just did this:


Yes!  Flooring happened.  And it is so pretty, thanks for noticing.  Here are a few more shots:


Sorry all these photos are taken from weird angles, but we can't walk on our floor until tomorrow night (the glue needs 24 hours to cure before use).

And really, this took us four hours to do-- it couldn't have been easier.  If you're thinking about putting prefinished engineered hardwood anywhere in your house, you can absolutely do it yourself no matter how little experience you have.  Simple process: lay out a row, making sure the joints are attractively staggered and there's nice variation in your pieces; measure the last piece and cut it to fit with your handy circular saw; put a quick bead of glue around the bottom edge of each board's groove; tap each into place with tapping block; repeat to make next row.  Voila!

As I've mentioned before, this beauty is Bruce 3" Engineered Hickory in Wheat.  It cost $3.49/sq.ft. from Home Depot's website (which is the only place I could find it-- lots of places sell Bruce Oak in Wheat, but the color is really different-- super red-- and though it's much cheaper at $2.79/sq.ft., it's just not nearly as pretty).  I was thinking I'd also put it in the laundry room and they tell you to account for 10% waste, so I ordered 9 boxes; we used 4.5.  Since you can use the offcut from one row's end piece as the start to the next row, our total waste was nowhere near 10% (which would have been 14sq.ft); I'd say we were closer for 2 square feet of waste (all tiny offcuts).  I'm undecided about putting it in the laundry room; my biggest concern is that the washer might leak at some point and totally ruin my floors.  Does anyone have experience with one of those rubber pan-things that goes under a washing machine?
 
Anyway, we chose our pieces to match the color and length variation in the flooring in the rest of the house, so we tried to find and use as many pieces as possible with burns from the sawmill, knots, and other irregularities.  And I love it.  I absolutely can't wait to get in there and trim the big window.  Then we just need to buy, install, and build-in the IKEA Bestas to hide the wack-ness under the big window.  And deal with the baseboard situation.  And so the renovation continues.

Just because I can't resist:


Now:


Tuesday, October 15, 2013

All the Trimmings

A sunny day in Oregon means a few more progress photos!  Not for the first time and certainly not for the last, your before shot of this angle:


And this morning:


You're seeing a few things in this photo.  First, drywall!  Yay for drywall.  I hate drywall mud with a fiery passion, but damn if I don't love the results.  Also, you're admiring my beautiful new window.  It opens!  And it's a legal egress window!  And it's pretty.  Win-win-win.  

You're also seeing a test-run of our new flooring.  Isn't it stunning?  It wasn't the cheapest option (though at $3.49/sq.ft., it's quite a bit cheaper than lots of other engineered hardwood), but it really closely matches the flooring in the rest of the house.  Our end goal has always been to make this room feel like it belongs in our home, and I think this flooring (despite costing $1 more per square foot than I'd originally hoped to spend) really goes a long way.

You're probably also wondering what the hell is happening at the bottoms of the walls, though.  Good question.  Those are the cinder-block footings for our walls (oh, the joys of what you find when you rip out old paneling).  You can also see the water pipe (which we'll be disguising with some built-in storage) in the center of the photo.  Here's a closer look:


But hey, you're also seeing our now-covered outlets!  And how's this for ya:


That's right!  I trimmed out the small window, and I think it looks about a thousand times better than it did here:


Or even two days ago:


Next up: trimming the big window and laying the floor.   Fingers crossed we can get most of that done this weekend.  Slow and steady wins the race.


Friday, October 11, 2013

State Of The Bedroom Address

Well, it's been a solid two months since we started demo on the third bedroom project and nearly a month since my last post.  We've been very busy at work (I won't bore you with the details) and we're also experiencing the appallingly early beginning of the rainy season.  Our old sofa is now sitting squarely on the third bedroom's still-unfinished floor along with a chair I scored when my friend M moved cross-country (more on both of those later).  All of these things sort of combined to mean I have absolutely zero acceptable photos of the now-painted walls and ceiling in the bedroom.  Either we're too busy or it's too dark out or I'm too embarrassed by our lack of progress to photograph it.  But today I'm sucking it up, so get ready for the first (crappy) photos of the paint job.  And I have to say, I'm very proud of my drywall.  To badly paraphrase classic horror villain Jame Gumb, I'd hire me.  

First, let's go back to the beginning of this project just to remind ourselves of how it used to feel in this room.  I present this photo without comment:


Now, if you'll pardon the dark photos, a bit of before and after...

Northwest corner then:


Northwest corner now:

 
North wall then:


 North wall now:


 Ceiling then:


 Ceiling now:


 So in case you're wondering, yes, I totally painted it almost-white.  It's actually the same color as the living room (Behr's Irish Mist), and once we get some nice glossy white trim going on in there, it should look a bit more like the pale gray it actually is; here's an old shot of the wall color / trim color contrast in the entryway.  Hi y'all!


The only reason the ceiling color and wall color appear so identical in the above photos of the bedroom is that it's dark in there right now.  The Pacific Northwest is tough for interior photography, and/or I have no idea how to artificially light a space before photographing it. 

So what's left to do?  A lot.  

First, flooring.  We're hoping to tackle that soon, but we need to get the old sofa out of there.  I've found a buyer who wants to come get it next weekend.  

[So, yeah, side note: after a couple of days of sitting on the new couch, we noticed that the giant gap in the cushions magically closed up-- the manufacturer assured me it would happen, and it did-- and the down has relaxed quite a bit, which makes the thing really comfortable.  Photos next time I clean the living room, I promise.] 

Anyway, the flooring I found was both budget-friendly-ish and a really close match to the hardwood in the rest of the house; like, it's close enough that I'd put it in the kitchen right next to the original flooring.  We've got the underlayment and we're ready to get started as soon as possible, but when you live in a 1350 square-foot house, there just aren't a ton of places for your old sofa to hang out.

After flooring, trim.  And that's going to be quite the project.  To make a long story short (too late), there are some big molding challenges in here, and we're going to have to get creative.  One of the many things we need to address is the pipe that feeds our outside spigot-- it sticks up through the floor and exits the house under the big window.  I'm currently leaning towards using this IKEA Besta unit to cover up the problem; I'd need two of those and one of the matching half-width ones to span the wall under the window.  They're available with pretty Shaker-style drawers; so they'd make GREAT storage if we chose to go that route; we could also go drawer-less and use the shelf space since, as two academics sharing 1350 square feet, we are under constant threat of being buried beneath a pile of books.  We'll add trim to make them look built in (there'd be a three-inch space on either side we'd have to cover with trim, no big deal) and I think they'll look nice and intentional rather than DIYed-because-of-the-spigot.

That's all for now-- tonight we're off to hear an author talk about his memoir, "Another Bullshit Night in Suck City."  Living four blocks from a major university definitely has its perks.


Thursday, September 5, 2013

[The Laundry Room] Wasn't Built In A Day

Let's take a quick look back at the late, not-so-great laundry room of yore:


Above is what it looked like from the third bedroom when we toured the house for the first time.  Dark, scary, and dirty with paneled walls and acoustical tile ceilings.  Let's see if I can dig up a few more photos:


Above: From the kitchen door after the washer and dryer were removed (the former tenant took them when he left).  That's the attic pull-down in the foreground and two weird closet-y things on the background, and that brick is the back of our chimney.


Above: again with the tenant's stuff during our home inspection.  This one was taken from the door leading outside to our breezeway.


I took the above shot after we got our new washer and dryer after a generous assist from my sister and brother-in-law-- without whom we would definitely not have been able to afford pretty white front-loaders-- and after I painted all the paneling white.  I think this was... late September of 2012?

 Again with the white paint job, this time the photo was taken from the kitchen door.

I'm not sure if you can tell in any of these photos, but the laundry room ceiling was beginning to sag.  The weight of the pull-down stairs was a bit much for it.  So we needed to shore it up a bit before we could proceed with any renovations, and we also wanted to frame in a space for the half bath we'd eventually like to put in.  The solution was to put a wall up immediately behind the pull-down stairs, thus turning all the space behind it into a potential half-bath (for now it's just a killer closet).  

In order to make room for the bath, we also needed to stack the washer-dryer, which meant removing the "cabinets" that were over them before.  The cabinets were, like all the others in this house, really just open-backed boxes with shelves sitting on ledger boards, and they were covered with old funky peeling shelf-paper.  And some rat poop on the top shelf (I'm guessing it fell down from between the attic floorboard--the acoustical tiles didn't extend into the cabinet, so the top shelf was pretty much open to the attic).  Suffice it to say I wasn't sad to see them go-- you generally don't want something that's been pooped on by rodents that close to your clean clothes.

We needed to move the junction box for the ceiling fixture from the low end of the ceiling (over the washer and dryer) to the high part so the washer and dryer would have enough clearance to stack, and our electrician took care of that for us when he was here addressing the situation in the third bedroom. 

Finally, the laundry machines have to sit about eight inches away from the wall because of the very enormous hookup for the dryer vent, and so the first thing you saw upon entering the laundry room from the kitchen was a whole mess of crap behind the dryer.  Some genius screwed a sheet of plywood against the wall (ostensibly to cover up some wires) and we really didn't have the know-how to address the situation.  Here's a dark photo to explain what I mean:


So in order to hide all of that and also make the laundry room look more like a hallway and less like a laundry room, we built a shallow wall.  We also needed to construct a soffit over the washer and dryer to accommodate some wiring at the ceiling.

While I still have a lot of taping and mudding to do in here, and we still need to hang the new ceiling fixture and put in flooring, and I still have to paint the shiplap behind the laundry machines, I'm just too happy about all the changes to wait til it's done.  I have to show you now.  Here's the view from the third bedroom as of this afternoon (again, please pardon the dark photos-- there are no lights in here yet!):


The future bathroom is behind that curtain-- it'll obviously have a door when it's ready to be a bathroom.

Cabinets are going to be installed to the right of the laundry machines so we'll have lots of storage.

From the kitchen door:


 From the third bedroom proper, through to the kitchen:


It's getting the same hickory engineered flooring as the bedroom.  

tl, dr: same view, July 2012 to September 2013:


,dWGFCKQ;OSDHjabsmvhvamdhkquhKjagdjyBAB.  That's me being excited!

Friday, August 30, 2013

Can't Stop The 'Rock

Sheetrock, that is.  We can't stop it.  Because if we do we will never finish it.

While my parents were here, we accomplished a massive amount of work.  Unfortunately, that means we have a lot of finishing to do.  First, we-- wait, let's back up for a minute and check out some befores and durings.

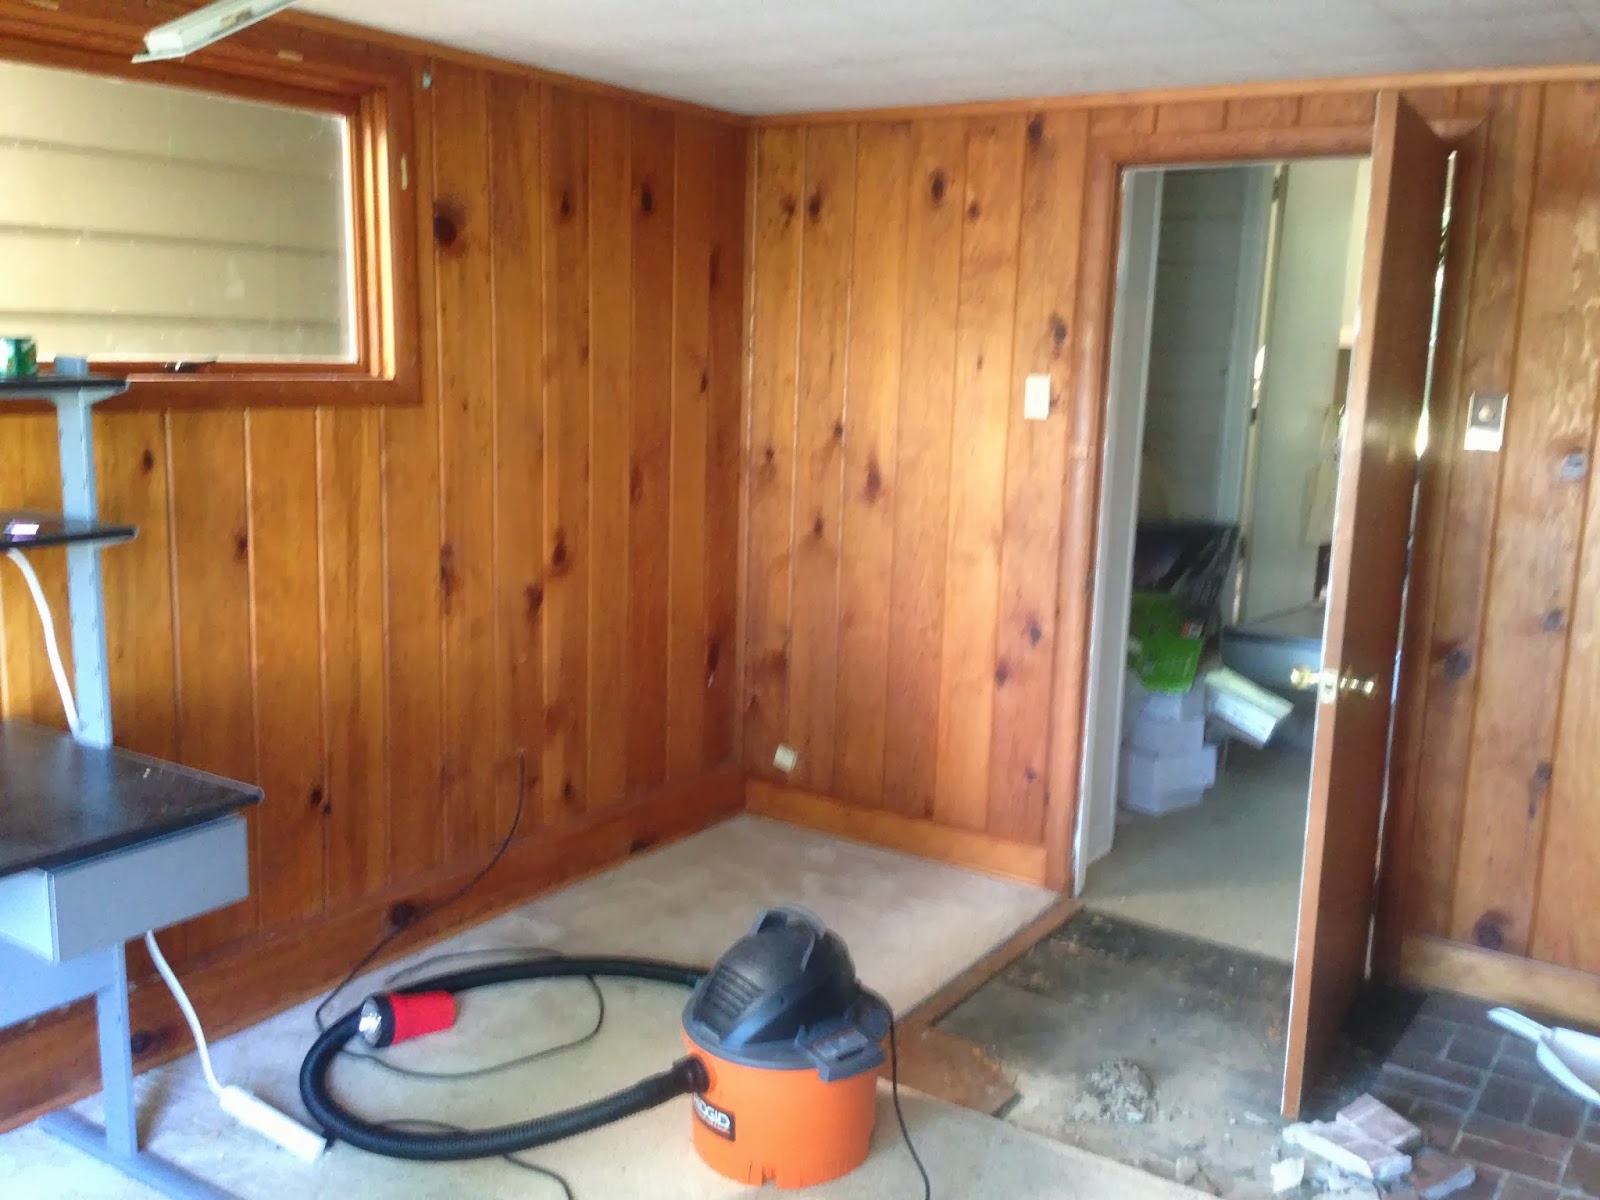
Here's a pretty good "before."  And by pretty good, I mean it shows how truly hideous the bedroom used to be.  Dark paneling, stained and sagging acoustical tile ceilings with a huge red thing hanging down (the red thing was the ceiling cap for the chimenea that used to be in this corner), awful dirty / ugly / smelly carpet, a brick corner, some pressboard tile (you can see it peeking out from beneath the carpet under the door), etc:


Here's the same view as of this morning.  Sorry I forgot to close the door, but I think you get the idea:


Here's another vista that really captures the frankly depressing quality the bedroom had before:


And same view this morning:


Something else very exciting happened in our house a couple of weeks ago and I completely spaced on posting about it, so here's a before of the weird (broken, funky, badly painted) fixed window we used to have:


And now, ladies and gentlemen, I present to you... a huge and beautiful legal egress window!


That one's in the living room (why don't I have any pictures of the bedroom one?) but it's identical to the one in the bedroom in every way.  Pretty.

Anyhow, along the way we ran into more than a few snags-- I'd say the sheetrock job in here was / is just about as complicated as sheetrocking can get.  Ray and Dad did all the work-- they had to cut around SIX outlets, a light switch, a cable, and two ceiling vents.  Add that to the fact that nothing in here is square (love my old house!) and that all the joists and studs had to be brought to the same level plane so the drywall could be attached, and you have a loooooooot of work to do.  So here's what we did:

1.  Demo.  See previous posts.  It was really gross.
 
2.  Electrical.  We had some outlets converted and some code violations addressed professionally.  Now we're safe and modern and up to code. 

3.  Insulation.  Fresh, clean insulation with no poop or rat holes in it!  Luxury, right?

Here's Dad standing in front of the newly insulated wall right after the first two sheets of drywall went up on the ceiling:


3.  Structure.  Adjusting levels / adding some support posts / getting ready for drywall install.

4.  Drywallin'.  It took days, but it was worth the time.  Good install means easy taping and mudding!  Sort of.

5.  Finishin'.  I'm presently on my second coat of mud all over the room (except the corners and the ceiling).  I'm nervous about the corners-- corners are tricky-- and I'm just dreading the ceiling because sanding drywall over your head is just plain awful.

So here's what we still have to do:

1.  Finish-coat of mud on the seams and screw-divots.
2.  Tape and mud ceiling and corners.
3.  Waterproof the concrete footings and address some complicated moulding issues (post coming soon!) and trim the door and windows and install baseboards. 
4.  Level the concrete subfloor, losing our self-leveling-concrete virginity in the process.
5.  Install underlayment and engineered hardwood flooring (Bruce Wheat Hickory from Home Depot is the winner, more on that to come). 
6.  Paint the room.
7.  Furnish it.
8.  Enjoy it.


Now if you'll excuse me, I need to call the company that's shipping my new sofa and arrange a delivery date.  So much excitement!


Friday, July 26, 2013

Dork-knob

We've talked about my doorknobs before.  A few times.  Half of them are original brass, perfectly petite, and the other half are a random assortment of butt-ugly orange monstrosities.  One of my first projects upon move-in nearly a year ago was to clean years of paint off the pretty (little) brass rosettes of the original knobs, and one of my most recent was finding vintage knobs to replace the ugly ones.  I wasn't sure if it'd work, so I started small with two sets of knobs-- one half-brass and half-chrome for the bathroom door and one brass pair for the guest room door.  If it works, I thought, I'll get another passage set for the guest-room closet and one for the soon-to-be-reno'd third bedroom; I'll also need a locking set for the door between the kitchen and the laundry room.

I'm just going to stop you right here, because I know what you're thinking-- only a total weirdo would spend $30 per door to replace ugly-but-functional doorknobs in a 1350-square-foot house.  You're right-- it's hardly Versailles, and the next buyer probably won't be quite as doorknob-obsessed as I am.  So from an investment standpoint, it's pretty stupid.  But from a mental-health standpoint, this is an absolutely mandatory upgrade.  And in case you doubt how truly hideous some of these knobs are, I present Exhibit A:


Gooooooo!  And if that's not enough, allow me to introduce a side-by-side shot of the bathroom knob (left, obviously) next to the vintage one I bought to replace it:


See?  SEE?  Now if that's not worth $30 of vintage door hardware, I don't know what is.  

Unfortunately, my worst fears were confirmed when we got back to Oregon last week and discovered that the ugly doorknobs were, in fact, attached to new-style guts-- so of course my spindle knobs weren't going to work.  We spent a hilarious week with no bathroom doorknob while Ray's parents stayed in our house with us.  If you really want to get to know your family, share a knob-less bathroom with them.  It's an experience, I assure you.  Fortunately, my wonderful in-laws handled it with grace and never once complained that I'd seemingly removed the doorknob immediately before they arrived just to make their seven days in Oregon as uncomfortable as possible. 

Meanwhile, I started doing a little research on houseofantiquehardware.com, and I thought I'd found the piece I needed to make my knobs work.  Here's what it looks like.  I still wasn't sure it was the right thing, but I ordered one for the princely sum of $5.95.  I also ordered some 3" rosettes, since the hole that'd been bored in my door to make way for the HUGE modern knob was too large to permit me to screw in my pretty little (2.25") vintage rosettes. 

What I didn't know is that House of Antique Hardware is located in Portland (yay Rose City!) and I got my hardware the next day.  I think my mother-in-law was a bit bemused when the package came and I started jumping up and down like a maniac and interrupted our conversation to run to the tool closet for a Phillips head.  But she shared my excitement when, two screws and fifteen hot seconds later, my bathroom door had functional vintage knobs on it:


Love.

Unfortunately,  I don't love the look of the bigger rosette:


 I really prefer the smaller vintage one as seen ob my entry closet door:


And I think I know how to make it work, so I'm currently planning an ambitious door-retrofitting project that I'll report back on shortly.  And the big rosette doesn't bother me nearly as much on the chrome bathroom side:


But at this point, after tracking down the perfect doorknobs and rosettes (they're an exact match to the original knobs I already had) and traveling 3000 miles with them, I'm inclined to see this mini-project through as completely as possible.  So retrofitting it is!  And I also need to order about a million more Standard Back Set Tubular Conversion Latches (say THAT five times fast) from House of Antique Hardware so I can do all the other doors.  And I have to find more sets of matching vintage knobs.  One thing at a time, right?


Sunday, June 16, 2013

One Step Forward

Remember the other day when I posted this photo of the new screen door?


As proud as I was of the door itself, I kept thinking that there was something (a few things) really sad about this photo.  Suddenly it hit me: ugly, washed-out-looking, unfinished, undefined-looking concrete stairs.  I decided to do something about them.

Behold:


Maybe we should do a side-by-side?

 It's Behr Semi-Transparent Concrete Stain in Loden-- it cost me about $25 for an entire gallon (of which I used, like, 1/4 cup on this project).  I brushed it on, first in one direction and then in the other to get a sort of crosshatch finish. Nice, right?

Next up: new (not ridiculously tiny) mailbox, bigger and brighter doormat, landscaping, window boxes, etc etc etc etc.