Showing posts with label Dad. Show all posts

Friday, August 30, 2013

Can't Stop The 'Rock

Sheetrock, that is.  We can't stop it.  Because if we do we will never finish it.

While my parents were here, we accomplished a massive amount of work.  Unfortunately, that means we have a lot of finishing to do.  First, we-- wait, let's back up for a minute and check out some befores and durings.

Here's a pretty good "before."  And by pretty good, I mean it shows how truly hideous the bedroom used to be.  Dark paneling, stained and sagging acoustical tile ceilings with a huge red thing hanging down (the red thing was the ceiling cap for the chimenea that used to be in this corner), awful dirty / ugly / smelly carpet, a brick corner, some pressboard tile (you can see it peeking out from beneath the carpet under the door), etc:


Here's the same view as of this morning.  Sorry I forgot to close the door, but I think you get the idea:


Here's another vista that really captures the frankly depressing quality the bedroom had before:


And same view this morning:


Something else very exciting happened in our house a couple of weeks ago and I completely spaced on posting about it, so here's a before of the weird (broken, funky, badly painted) fixed window we used to have:


And now, ladies and gentlemen, I present to you... a huge and beautiful legal egress window!


That one's in the living room (why don't I have any pictures of the bedroom one?) but it's identical to the one in the bedroom in every way.  Pretty.

Anyhow, along the way we ran into more than a few snags-- I'd say the sheetrock job in here was / is just about as complicated as sheetrocking can get.  Ray and Dad did all the work-- they had to cut around SIX outlets, a light switch, a cable, and two ceiling vents.  Add that to the fact that nothing in here is square (love my old house!) and that all the joists and studs had to be brought to the same level plane so the drywall could be attached, and you have a loooooooot of work to do.  So here's what we did:

1.  Demo.  See previous posts.  It was really gross.
 
2.  Electrical.  We had some outlets converted and some code violations addressed professionally.  Now we're safe and modern and up to code. 

3.  Insulation.  Fresh, clean insulation with no poop or rat holes in it!  Luxury, right?

Here's Dad standing in front of the newly insulated wall right after the first two sheets of drywall went up on the ceiling:


3.  Structure.  Adjusting levels / adding some support posts / getting ready for drywall install.

4.  Drywallin'.  It took days, but it was worth the time.  Good install means easy taping and mudding!  Sort of.

5.  Finishin'.  I'm presently on my second coat of mud all over the room (except the corners and the ceiling).  I'm nervous about the corners-- corners are tricky-- and I'm just dreading the ceiling because sanding drywall over your head is just plain awful.

So here's what we still have to do:

1.  Finish-coat of mud on the seams and screw-divots.
2.  Tape and mud ceiling and corners.
3.  Waterproof the concrete footings and address some complicated moulding issues (post coming soon!) and trim the door and windows and install baseboards. 
4.  Level the concrete subfloor, losing our self-leveling-concrete virginity in the process.
5.  Install underlayment and engineered hardwood flooring (Bruce Wheat Hickory from Home Depot is the winner, more on that to come). 
6.  Paint the room.
7.  Furnish it.
8.  Enjoy it.


Now if you'll excuse me, I need to call the company that's shipping my new sofa and arrange a delivery date.  So much excitement!


Wednesday, August 21, 2013

Rebuilding the Third Bedroom: Day One

One day of work on the reconstruction of the third bedroom is complete.  In a few days, it will rise, phoenix-like, from the rubble of its former self.  Today was kind of messy and insane, but I'll sleep a little better tonight knowing that attic floor is fully supported and won't come crashing down on our unsuspecting guests.  

Today Ray and my dad (with regular assists from Mom and me) sistered all the torn-up attic joists and supported them with new studs.  First we put up a T-post to support the joists temporarily, then we set our new 2 x 6 joists.  This shot shows the first sistered joist going in:


Here's a little more progress:


And here's my feels-guilty-just-standing-here-while-Dad-does-all-the-work selfie:


Now all the joists are sistered and secure and they're all perfectly level for drywall install.  It wasn't an easy job, partially because the old fir joists and studs are incredibly hard, and whoever did this the first time left behind about 67 bent nails in every board we had to remove to make our fixes.  I took the following photo of some of my favorite bent nails and nail-filled bits of fir:


Yes, that is a piece of wood with seven bent nails in it.  And I LOVE the nail in the center of the photo-- I have no idea exactly how you make a nail turn at a right angle and then loop around into a hook, but evidently it's possible.  So... that's what's been holding up my attic since the 60's.  SO lucky it never fell in.  And so grateful my parents are here to help us do all the stuff we could never, ever, ever do ourselves.  We're learning everything we can and filing away lots of knowledge for future renovations.  Kitchen, I'm looking at you.

On deck for tomorrow: prepping the walls for drywall, moving some wiring, insulating the ceiling, etc.  I can't wait for this space to start looking like an actual bedroom!

Friday, November 30, 2012

In The Sh!tter

Please pardon my nasty French.  It's just that I've spent the last two weeks hanging out in the bathroom, and I'm beginning to tire of spending all my time in a 4'x8' space.

Most of that time has been spent slowly building layers of joint compound onto the drywall patch we installed after The Thing came down.  You see, the ceiling and walls over the tub are wildly uneven from years of being soaking wet.  They have gentle rolling hills, craggy cliffs, and a rocky coastline--  I'd compare them to the general topography of... Ireland, maybe?  So in places I'm having to build lumps out of joint compound so that the drywall patch will match up to the lump that's already in the ceiling.  This. is. crazy.

But it's okay, because this summer we're obviously going to have to rip out all the ceilings and drywall in the bathroom before we tile the shower surround.  This is a temporary thing, and I'm considering it a learning experience.

I finally finished one side of the wall patch, and I decided I'd go ahead and sand it and apply the orange-peel texture (mmm, my favorite! blergh.) so it'd match the rest of the drywall in the room.  Here's a shot of my orange-peel drying (you can really appreciate the giant lumps in the ceiling here, no?):


You can also see some brownish mold, courtesy of The Thing, on the wall there on the left-hand side of the photo.  Thanks a lot, The Thing.  And you can also see that my corner piece appears to be a bit uneven; not sure if you can tell that this is because there's a massive lump on the other wall.  I'm working with what I've got here, people.  Like I said, it's temporary.  And I'm actually fairly pleased with myself for getting the actual wall so even and replicating the orange-peel.

And since I couldn't resist, I went ahead and painted the patch too:


Paint's still drying, and you can REALLY see how crazy the ceiling is in this photo.  Few more layers of mud to go up there.  Ugh.

So, while I was between layers of drywall mud last week, Ray and I decided we'd finally tackle the leaking toilet.  A bit of water had been seeping out from around its base with every flush.  We'll just replace the wax ring, we thought.  No big deal, right?  This'll take twenty minutes.

Wrong, wrong, wrong.  We failed to take into account that hiding behind every wall, light switch, and fixture in this house is an unpleasant surprise.  We removed the toilet and discovered that 1) the flange under the toilet was cast iron, 2) it was broken, 3) there was literally no floor under the flange.  The flange was just sitting on top of the pipe.  We thought.  So we tried to remove it-- we'll just replace it with a modern one, we thought.  Off to Home Depot for a replacement!  We'll be done in an hour.

Nope.  Wrong again.  We could. not. pry. that. thing. up.  And we broke it a little more in the process.  We checked on the Internet and learned that cast-iron flanges are generally attached to the sewer pipe with lead.  Yup.  On to Plan B.  Back to the Home Depot.  But they don't have the piece we need to repair the floor (which is to say, a set of metal plates that go underneath the flange instead of floor).  I don't even want to TALK about what we had to do to repair the flange as best we could and make it as stable as possible.  Suffice it to say that McGyver would be proud, and that when we finished, we were laugh-crying and there was old toilet wax all over everything we own and we were barely speaking to each other.  But we reinstalled the toilet, and to our continued surprise, it's not leaking anymore.  So we "fixed" it.  We didn't fix it, but we "fixed" it, and that's good enough for us until the whole thing falls through the floor (or lack thereof).  

And finally, I decided to tackle something that's been making me crazy since we moved in.

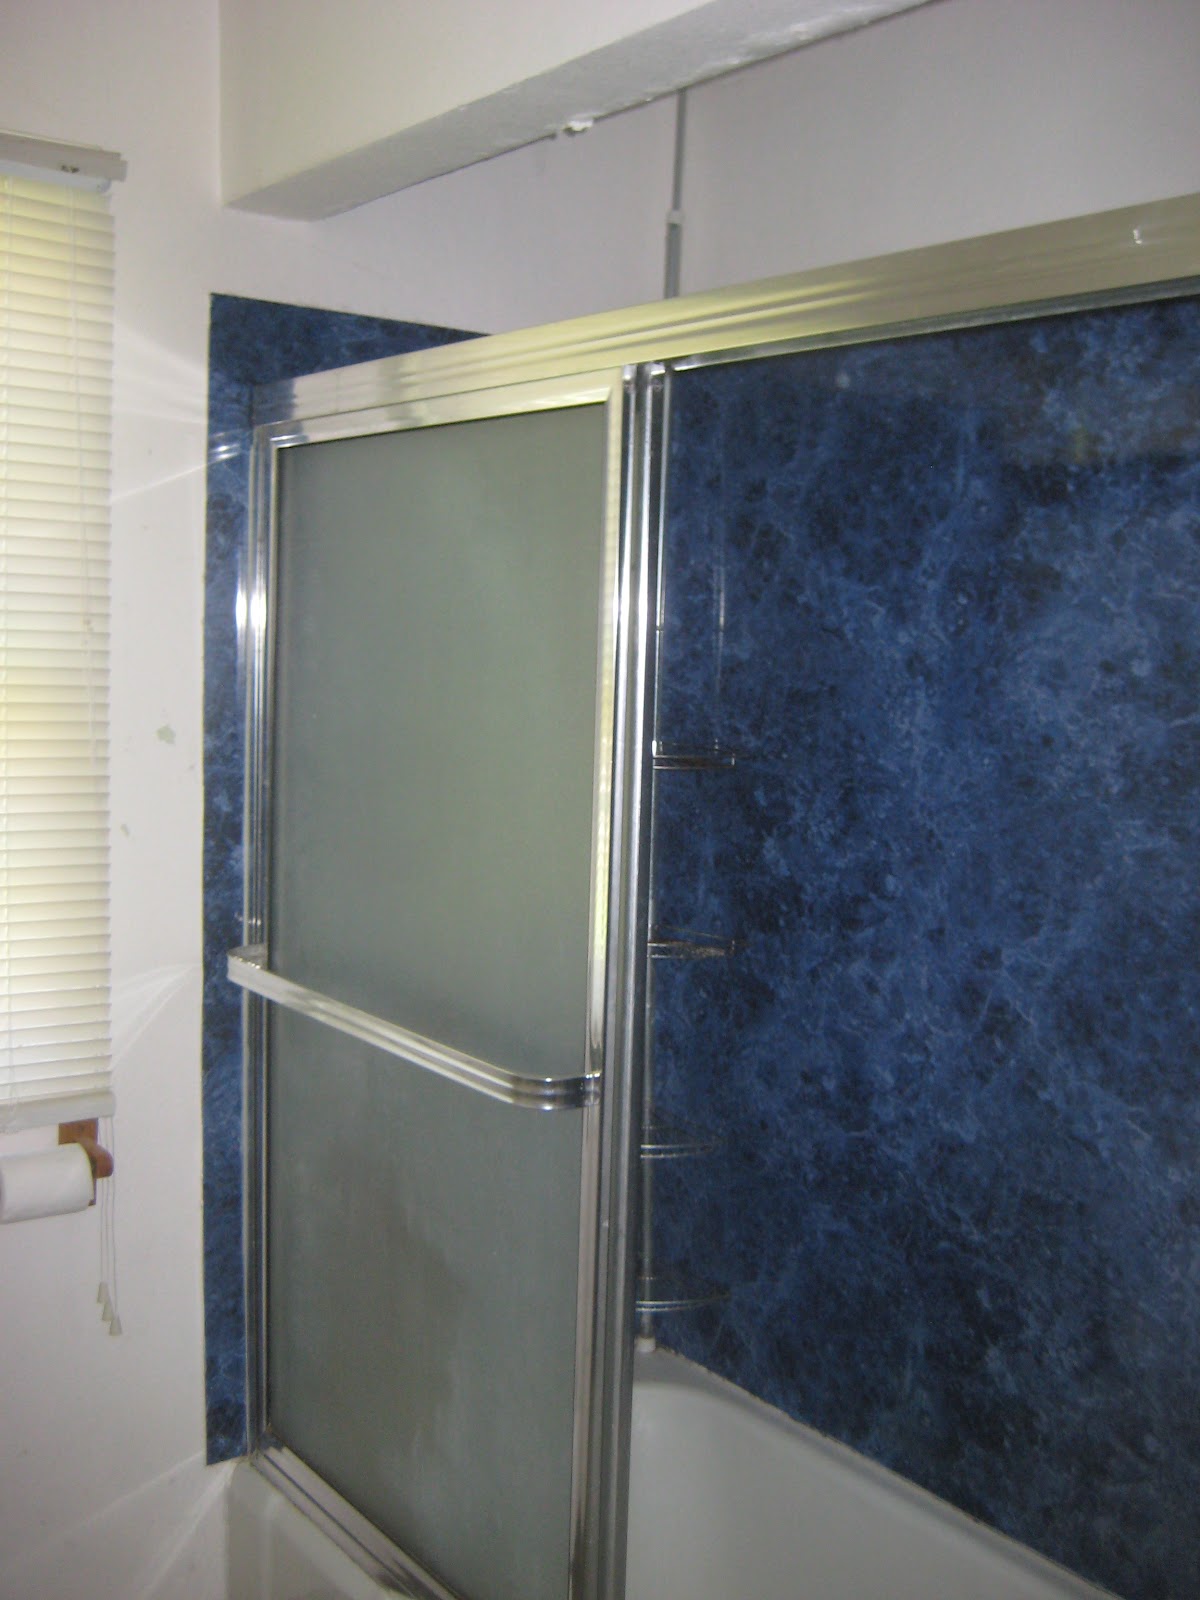
When we bought the house, the shower had the grossest sliding glass door:


Also loving the old wooden toilet paper holder that was roughly four feet from the toilet.  Why? 

And just in case you need a reminder, here's what the faucet and emergency drain looked like.  Can you BELIEVE I begged my husband to buy this house with me?  Even I can't wrap my mind around how I managed to fall in love with the place after seeing this:


And as I mentioned in the third-ish ever post way back in August, we ripped the shower door out immediately.  And this is the horror we found beneath the track:


Aaaand I just gagged.  Anyhow, as I mentioned in that super-old post, I scrubbed the hell out of every surface in the bathroom.  Eventually I got the majority of this evil off the tub.  But a huge clump of funk remained where the wall meets the tub meets the Blue Monster.  And as you can see in the photo, there's also a huge gap there that was never caulked.  And there was a five-inch-long strip of ugly mildewy adhesive about halfway across the tub that would. not. come. off.  So basically every morning when I get in the shower I cringe at the horror.

But I'll cringe no longer.  Today I set to with a chisel, some extra-fine-grit sandpaper (we'll be refinishing the tub when we tile the shower surround anyway, so taking a little finish off was hardly the worst thing that could happen) and a brand new tube of caulk.  I scraped all the old moldy caulk out and replaced it with a nice fresh bead, I filled the weird gaps, and I sanded the stubborn adhesive off.  And now, ladies and gentlemen, if you'll pardon the dirty footprints in the tub itself (don't want to get any water in there until my caulk dries!), please admire my handiwork:


Finally funk-free.  And now a detail shot of the faucet wall.  And yes, I know there's still a HUGE BLUE PLASTIC shower surround here.  Still, give me some credit.  We're getting there.


 Sloooooooooooooooowly.


Friday, August 31, 2012

Bathroom Blitz

When we moved in to our new one-bathroom abode, we thought we'd have to live with that bathroom-- filthy, hideous, and nonfunctional as it was-- for a while.  After all, we know nothing about plumbing.

And it looked like this:

Left side from hallway.


Right side, ick.

Just give yourself a moment to appreciate this.

Obvious issues: tiny sink detaching itself from wall (perhaps trying to escape), comically small medicine cabinet mounted so high that at 5'9" I could only see the top of my head in the wee little mirror, oddly placed wooden fixtures from the 70's, weird vinyl trim where baseboards should have been, ill-fitting saggy cheap blinds completely covering the window, moldy shower door, blue faux-marble monstrosity, unloved original tub in desperate need of a refinish, slightly pink Marmoleum floors, tragic light fixtures.

I mean, that is a LOT of work for a room measuring four feet by eight.

But there are some positives too.  The original tub is big and deep and has that appealingly chunky forties look.  When the bathroom door is closed, a built-in floor-to-ceiling cabinet is revealed behind the shower-- three big shelves behind doors on top, three huge deep drawers underneath.  The toilet is newish, and the big window lets in lots of light.    

And we thought we could just settle for a hella-thorough cleaning.  On our first day in the house, we changed the blinds and ripped out the foul shower door, and I used a chisel (nope, not kidding) to pry the pile of God-knows-what (see previous post) off of the emergency drain.  The shower door didn't go down without a fight, but after several hours of scraping moldy caulk off my tub I was glad I'd done it.  Then I put on vinyl gloves and the real work began: I scrubbed every surface until my arms ached.  I vacuumed out the cabinet and wiped down the shelves and drawers, scraped peeling paint off the ceiling over the tub, washed the pink floor on my hands and knees, polished the exposed chrome plumbing under the sink, cleaned the mirror, etc etc etc.  And when at long last I stood back to admire my work, there was nothing to admire, because it still looked like crap.  Sigh.

And it still looked like crap when my parents arrived two days later to help me get a jump on some projects while Ray was out of town.  And if you know my father, you know where this is going.

In case you haven't met him, you should know that my dad can literally do anything.  Not exaggerating.  "Prove it," you say.  Ladies and gentlemen of the jury, may I present Exhibits A and B:


Exhibit A.

Exhibit B.  Still haven't put the knobs on the vanity.  Oops!  Not sure why the hallway trim looks pink in this photo either.

Yup, told you so.  And please pardon the fuzzy iPad photos.

That is my bathroom after a few days with Dad.  Here's a breakdown of what you're looking at: new sink, new vanity, new faucet, new baseboard molding, fresh paint, new glass shelf and mirror, new blinds.  Here's what you can't see: Dad had to repair the walls to attach the baseboard, install new plumbing under the sink, and patch the drywall and replicate its orange-peel texture where the old medicine cabinet used to be.  And we also painted our built-in cabinet inside and out and gave the vanity (a $99 Home Depot find that was originally a weird orangey wood tone) a fresh coat of Behr Ultra two-in-one. Total spent for this bathroom overhaul, including plumbing supplies and tools: about $250.

Still to come in the bathroom: changing the light fixtures, subway-tiling the shower walls, and DIY-refinishing the tub.  But for now, if you're drinking, and obviously you are, raise a glass to my father!

To recap:

 Before Dad.

 After Dad!