Showing posts with label Laundry. Show all posts

Thursday, September 5, 2013

[The Laundry Room] Wasn't Built In A Day

Let's take a quick look back at the late, not-so-great laundry room of yore:


Above is what it looked like from the third bedroom when we toured the house for the first time.  Dark, scary, and dirty with paneled walls and acoustical tile ceilings.  Let's see if I can dig up a few more photos:


Above: From the kitchen door after the washer and dryer were removed (the former tenant took them when he left).  That's the attic pull-down in the foreground and two weird closet-y things on the background, and that brick is the back of our chimney.


Above: again with the tenant's stuff during our home inspection.  This one was taken from the door leading outside to our breezeway.


I took the above shot after we got our new washer and dryer after a generous assist from my sister and brother-in-law-- without whom we would definitely not have been able to afford pretty white front-loaders-- and after I painted all the paneling white.  I think this was... late September of 2012?

 Again with the white paint job, this time the photo was taken from the kitchen door.

I'm not sure if you can tell in any of these photos, but the laundry room ceiling was beginning to sag.  The weight of the pull-down stairs was a bit much for it.  So we needed to shore it up a bit before we could proceed with any renovations, and we also wanted to frame in a space for the half bath we'd eventually like to put in.  The solution was to put a wall up immediately behind the pull-down stairs, thus turning all the space behind it into a potential half-bath (for now it's just a killer closet).  

In order to make room for the bath, we also needed to stack the washer-dryer, which meant removing the "cabinets" that were over them before.  The cabinets were, like all the others in this house, really just open-backed boxes with shelves sitting on ledger boards, and they were covered with old funky peeling shelf-paper.  And some rat poop on the top shelf (I'm guessing it fell down from between the attic floorboard--the acoustical tiles didn't extend into the cabinet, so the top shelf was pretty much open to the attic).  Suffice it to say I wasn't sad to see them go-- you generally don't want something that's been pooped on by rodents that close to your clean clothes.

We needed to move the junction box for the ceiling fixture from the low end of the ceiling (over the washer and dryer) to the high part so the washer and dryer would have enough clearance to stack, and our electrician took care of that for us when he was here addressing the situation in the third bedroom. 

Finally, the laundry machines have to sit about eight inches away from the wall because of the very enormous hookup for the dryer vent, and so the first thing you saw upon entering the laundry room from the kitchen was a whole mess of crap behind the dryer.  Some genius screwed a sheet of plywood against the wall (ostensibly to cover up some wires) and we really didn't have the know-how to address the situation.  Here's a dark photo to explain what I mean:


So in order to hide all of that and also make the laundry room look more like a hallway and less like a laundry room, we built a shallow wall.  We also needed to construct a soffit over the washer and dryer to accommodate some wiring at the ceiling.

While I still have a lot of taping and mudding to do in here, and we still need to hang the new ceiling fixture and put in flooring, and I still have to paint the shiplap behind the laundry machines, I'm just too happy about all the changes to wait til it's done.  I have to show you now.  Here's the view from the third bedroom as of this afternoon (again, please pardon the dark photos-- there are no lights in here yet!):


The future bathroom is behind that curtain-- it'll obviously have a door when it's ready to be a bathroom.

Cabinets are going to be installed to the right of the laundry machines so we'll have lots of storage.

From the kitchen door:


 From the third bedroom proper, through to the kitchen:


It's getting the same hickory engineered flooring as the bedroom.  

tl, dr: same view, July 2012 to September 2013:


,dWGFCKQ;OSDHjabsmvhvamdhkquhKjagdjyBAB.  That's me being excited!

Tuesday, August 6, 2013

Third Bedroom, We Barely Knew Ye (Thank God)

Before we totally rip the third bedroom and laundry room apart, I thought we should do a brief retrospective.  Let's take a quick look back at the way they were when we moved in, shall we?

View from kitchen door through laundry room, attic stairs extended, tool closet on the right, horrible filthy mismatched curtains on the big old window:


Laundry room and broken-down attic stairs in all their...glory?


Laundry room a quick coat of paint or four, new appliances, and a curtain over the weird closet-nook:


Blurry photo from the other direction:


Plans for this space:

1.  Move light fixture (i.e., bare bulb dangling from the ceiling) and replace with this.
2.  Build wall to frame out what will eventually become a half bath in the back of the space (the end of the room from whence the above photo was taken.
3.  Hang bathroom door.
4.  Convert tool closet so it opens from the bedroom rather than the laundry room; this will involve replacing the paneling on the back with paneling we remove from the 3rd bedroom.  Ditto the new wall we're building.
5.  Install engineered hardwood flooring in the laundry-room side.
6.  Use bathroom side as a storage closet until we have enough scratch for a half-bath.
7.  Demo cabinets above washer / dryer.
8.  Replace attic stairs and drywall the ceiling.
9.  Build new shelving for laundry supplies.
10.  Trim to match the rest of the house, paint.
11.  Replace the door (and hardware, naturally) between the kitchen and laundry rooms with a glass-paned French door.

Whew, that's a lot of stuff.  Anyone wanna take bets on how much of this we will ever get done?

Now onto the third bedroom:


What we're about to do:

1. Remove acoustical tile ceilings and furring strips, carpet, pressboard tile, paneling, and brick pad / mortar
2.  Get our electricians (an awesome husband-and-wife duo) out to cap off the junction box in the ceiling (the ceiling is too low for an overhead fixture), safely remove the old (unnecessary) baseboard heating and disconnect the wiring, move the outlets (which for some reason are located halfway up the walls) down to the baseboards where normal people put their electrical outlets, and replace the outlets with GFCIs.  We really like our electricians, so I don't feel weird about giving them all that money.  
3.  Drywall the walls and ceilings.
4.  Have the window replaced with one that opens, not only for comfort's sake, but because the we need an egress window in order to have a legal third bedroom.  Happening August 13 on our one-year homeowning anniversary!
5.  Trim windows, doors, and baseboards with moldings that match those in the rest of the house.
6.  Install floating engineered hardwood floors.
7.  Paint.

We're hoping to have a lot of the bedroom work done when my parents arrive in two weeks-- that way they can help us where we clearly need it most (the laundry space).  We'll update as we go, and I can't. freaking. wait. to show off some After photos.  Our first dumpster is arriving tomorrow morning, and the quest for flooring continues.  If you have any good karma to send our way, we'd appreciate it!

PS: You know you're busy when both you and your spouse forget your wedding anniversary until your mom calls to wish you a happy one.  Yep.  That just happened.


Friday, September 21, 2012

Before & During (Part I of 736,824,061)

We've finally made some progress in most of our public spaces-- living and dining rooms, kitchen, laundry / utility / mudroom area.  The photos below are obviously not shot-for-shot before and afters for a couple of reasons: 1) it turns out I am AWFUL at taking pictures and can't seem to duplicate a shot even if I'm the one that took the original, and 2) these are not afters so much as durings.  We still have a lot of work to do in every one of these rooms.  So following each photo is quick rundown of what we HAVE done and a little bit about what's left to do.

We'll go about this as though it were raining (which it will be for about the next ten months) so you've decided to park under our carport and come in through the laundry room door.  Which, by the way, we do not encourage.

LAUNDRY AREA:

This is the inside of the door you just walked through ca. August 13, 2012.  To help you orient yourself a bit, the kitchen door is to your right and the third bedroom door is on your left.  You can see a bit of the tool-storage area on the left-hand side of the photo, and the electrical panel is just to the right of the photo frame.  It's dark and scary in here, no?  You're just about ready to run screaming from the house, but you don't for whatever reason.


Instead, you back up and take the long view of the same corner, though now the security door is just out of your photo frame on the left:

 Oh no!  Check out that ill-fitting plywood (see those gaps?  Is that safe?  You don't think so) into which the electrical panel is screwed!  This place is terrifying.  The walls are a lovely mélange of plywood, vertical paneling, and shiplap.

Fast forward to September 21.  The below photo is sort of a combination of the first two views, with just a few modest changes: 


What we've done:  painted everything obsessively, added drywall to the wall behind the electrical panel, gotten a gorgeous new washer-dryer which we could never have afforded but for my sister and brother-in-law, covered the tool-storage closet with a curtain.  

What still has to happen: the place needs ceilings-- the acoustical tile that's currently overhead is unspeakably ugly and actually missing in places, leaving the attic open to the laundry room.  And did I mention we have roof rats in the attic?  Yeah.  So just have to find out if our tiles are asbestos.  If not, we'll rip them down, avoiding showers of rodent crap, and drywall the ceiling.  If so, we'll pay someone else to rip them down.  And then drywall the ceiling.  If you look carefully, you can see I still need to caulk the top of the seam between the drywall behind the electrical panel and the wood paneling.  Obviously the ripped-up linoleum flooring is on its way out, to be replaced by 12"x24" peel-and-stick faux slate.  We'll grout of course.  What do we look like-- savages?

Before heading into the kitchen, you turn around to check out the other side of the laundry room.  Flashback to 8/12/12:


It's too horrible!  You close your eyes.  When you repoen them, you're back in the present day:


Remember to take the tag off that area rug before you photograph it again, you remind yourself.  And you turn around and head into the...

KITCHEN.  

Flashback:


Ew!  Everything about this must be gutted, obviously.  It is gross.  Those weird doorless shelfless cabinets-- who did that?  And there's no place to put anything in here.  Though you can't see it from this view, there are also no cabinet doors on the left side of the kitchen.  And that fridge holds roughly two bottles of hot sauce and a six-pack of Natty Light-- perfect for a college boy, but not going to work for someone who produces three elaborate meals per day.  The oven has no timer, and all the eyes are so tilted that your pots and pans slide off immediately.


Today:


Better, no?  Functional stainless appliances (made possible, as with the washer-dryer, by unbelievably generous gifts from our families) make this much more workable and a lot more attractive.  My IKEA Billy bookcases were relieved of their book-holding duties and brought in for some extra storage on either side of the stove.  

What still has to happen:  Um, everything.  New cabinets all around, new floors, new countertops, real baseboard molding, new light fixtures, blah blah blah blah fifteen thousand dollars. 

You head for the door at the far wall.  Well, now you're in the...

DINING ROOM.

You walk through and stand in the living room so you can get the full view in flashback mode:


Yep, that's what it looked like in July (obviously not our stuff).  Anyhow, you're standing in the living room, and you can see the kitchen door at the left of the photo, and out the french doors is the electric green lawn brought to you by the Pacific Northwest.  I don't really feel the need to say anything about this photo, except that I think that thing hanging on the wall on the right is a snakeskin, not... what it looks like.

And as of today:


Just got that table today.  I'm not sure I love it, but maybe once we get some chairs?

Still to do: install new light fixture, hang art, find chairs (preferably cool antiques).  Maybe a skinny dresser on the right-hand wall to serve as a buffet and store my kitchen and dining linens?  Thoughts?

You turn around to check out the progress in the...


LIVING ROOM.

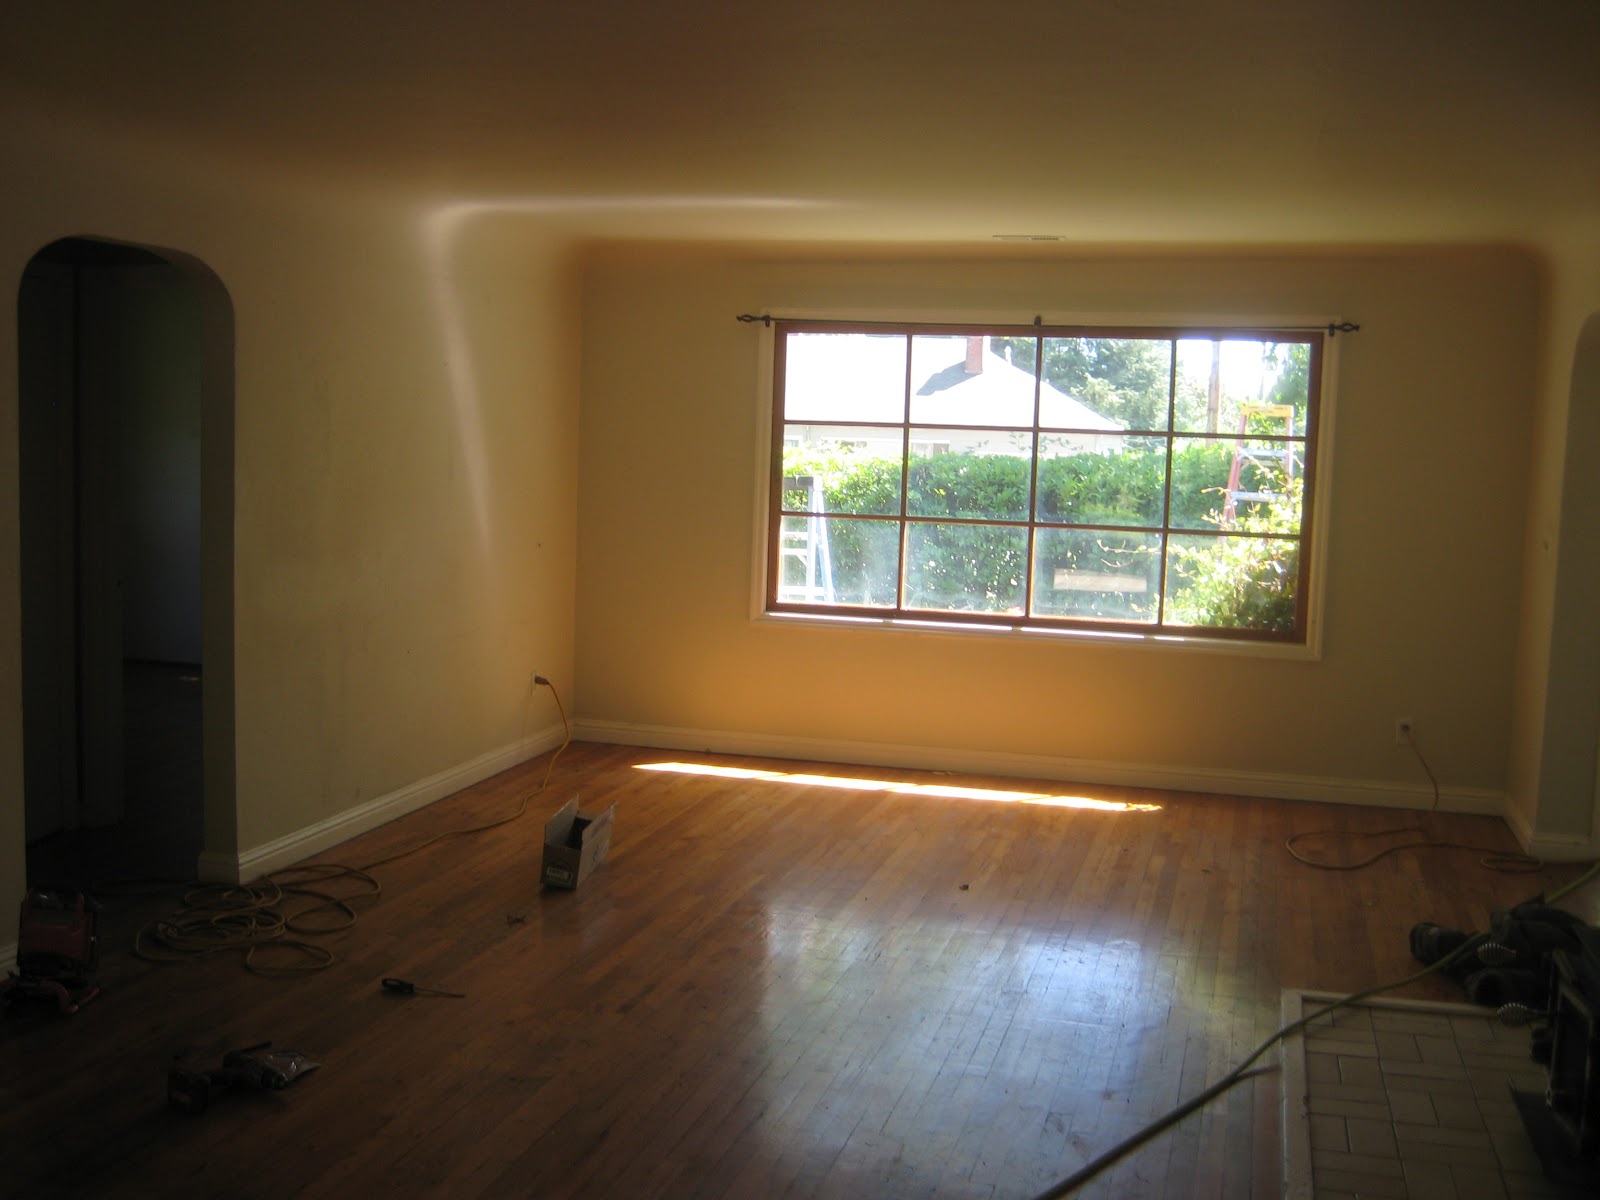
Circa 8/10/12:


Left side, awful lighting.

Right side.

You're like, wait, why are those window mullions not painted?  Why is that gross woodstove jammed into the fireplace?  That tile is ugly.  Nice archways, though.  You close your eyes and flash forward. 

Combo view:


What we've done: painted the window mullions (ask my mom about that-- it took SO MANY coats of paint and primer because the wood has some sort of super-tannins that CANNOT be blocked by mere mortals, so Mom painted it for six straight days while Dad reno'd the bathroom), painted the fireplace, ripped up the icky tile, painted the walls and trim, added curtains (love you, $9/pair IKEA Vivan!) and hemmed them, hung a few things.

Still to do: hang way more things, make new throw pillow covers, reupholster the golden corduroy armchair my mom purchased new in 1983, tile fireplace surround, repair damaged wood floors.

If you're digging my old threadbare Persian, you can thank my grandmother, who has told us at different times that 1) it belonged to her mother and is a priceless antique, and 2) she herself bought it at a yard sale in the 60's.  I prefer version 1, so I'm going with that.  The rug is special to me anyhow-- if slightly too small for my space-- because it was in my parents' first house and also my sister's, and now it's come out to the West Coast to make my first house a home. 

Hope you enjoyed the tour!  You can just show yourself out the front door.  And while you're out there in the front yard, give Ray a high five-- he's probably digging up some bamboo roots, removing a massive hedge, rat-proofing, mowing the grass, etc etc etc even as we speak.