Showing posts with label Fireplace. Show all posts

Sunday, January 20, 2013

One Down, Seven To Go

BREAKING NEWS: we have finally completely finished one room in the house.  The living room is done!  Today we stained and attached quarter round to trim our new slate fireplace hearth.  While we were at it, we scored a pretty handsome (and very inexpensive, I might add) fireplace screen and some new fire tools from Target.  And now we are done.  Please admire:


And the obligatory detail shot:


Now we'll take a quick look back through the various phases of transformation.  First, here's what we saw the first time we ever saw the house in June 2012:


Yeah.  Before we closed, the woodstove was removed (first off, we didn't want it for obvious reasons-- i.e., it was hideous-- and second, it was not certified so our lender required it to be out before closing). Here's what it looked like as my dad pried up the huge tile pad one week post-closing:


The removal of the giant tile pad left us with some scarred-up hardwood flooring and a bare concrete pad.  About a month later, I made a mixture of 1/2 Behr Ultra Pure White (our trim color) and 1/2 Behr Irish Mist (the wall color in the living and dining rooms) and painted the brick:


 Sorry about the blurriness-- at that point I was even more pathetic with the camera than I am now.  The next shot really shows off the damaged hardwood we were left with when the tile pad was removed:

 
Next step: refinishing the floor.  We went from here (don't mind me cheesin' and looking HORRIBLE in this photo, okay?):


To here:


And then we bought some slate:


And laid it.  And today, we finished the project.  Which means we went from here:


To here:


...in about five months (which is nothing to be proud of, but hey-- we work full time and we've done plenty of side projects in the meantime) and for a total cost of around $100.  

And now it's time for a breakdown (10 points to the first commenter who can correctly identify the 90's song I just obnoxiously quoted):

Removal of woodstove: FREE to us (thanks to our amazing realtor)
Removal of tile pad: FREE
Paint for brick: FREE  
(sample of Ultra Pure White in flat finish left over from our trim-color decision + leftover Irish Mist from living room paint job)
Leveling compound for hearth: $14
Tile for hearth: $66 including shipping
Thinset for hearth: $20
Stain for floor and quarter-round: $5
Quarter-round: $5

GRAND TOTAL:  $110

  I'll take it.  Just seven rooms left until we're done!  Hahahahahahahhahahahahahahahah.


Tuesday, October 30, 2012

Slate the Great*

At last fireplace update, we'd ordered some pretty Montauk Black slate for the hearth.  And it came last week.  And it was the wrong size.  

We'd ordered 18"x18" tile, which would fit with no cutting into our 18"x72" hearth.  We're not afraid of a little wet-saw action now and then, but since we'd never used one before, we were wary of cutting our teeth (or potentially cutting our fingers off?) on such a high-visibility project as the hearth.  So when our would-be 18"x18" tile arrived measuring in at 15.75" square, we called marblewarehouse.com immediately.  Since we know less than nothing about tile, we weren't sure if maybe 18"x18" tile was like 2"x4" lumber (which is to say, nowhere near the size its measurements claim it to be), but the awesome customer service rep with whom I'd been dealing confirmed that there'd been a mix-up in the warehouse and that we'd indeed been shipped 16"x16" tiles.  Now, get this-- because marblewarehouse.com is TOTALLY AWESOME, they apologized for the mix-up, let us keep the 16" tiles free of charge, and sent the 18"x18" tiles out the same day.

(And all of this was after I, when placing the initial order, ordered the wrong quantity (I stupidly went by number of tiles rather than square feet, even though the website clearly states that you should order by the square foot).  My customer service rep called AND emailed me before shipping because something didn't look right about the quantity I'd ordered.  She helped me convert to square feet and corrected the mistake.  At this point I've had so many positive interactions with marblewarehouse.com I'm considering naming my firstborn child after it.  So if you're thinking about a tile project and live on the West Coast, check 'em out.)

And the tile. is. so. pretty.  It fits perfectly.  Here's a photo of the dry-fitting:
 

And from across the room:


Next steps: laying the tile, sealing it (which will make it look a bit darker), grouting the 1/8in seams between the tiles (I'm thinking dark gray for the most seamless look possible), and adding quarter-round to the whole thing.  The rugs I ordered should be coming in on Thursday and we're both buried under mountains of papers to grade this weekend, but we're hoping to totally complete the project before Thanksgiving.  And I can't wait to post definitive before-and-afters.


*other titles I considered for this post: Tile File, Definitely Stoned, and a lot of Duchess of Wales puns like Slate Middleton Weds Prince William or Waity Slate-y or Duchess Slate Dazzles In Jenny Packham At Charity Event!**  

**Except not really that last one, but I do love Jenny Packham. 

Saturday, October 20, 2012

Fireside Chat Part II

I spent the last two days leveling the hearth in preparation for tile.  This doesn't sound like a very glamorous process, and it wasn't.  It started out looking like this:


Not sure how it happened, but as you can clearly see, it's way too uneven for tile installation.  So I taped off the floor, thoroughly swept the hearth, and had at it with some floor-patching compound.


Here's my first coat drying.

Flat 'n' ready this morning:


Now we can talk tile: 18" x 18" Montauk Black cleft slate.  Why?  Partly because I'm guessing this house originally had slate, and the super-active multicolored slate that's everywhere right now isn't the kind it would have had.  We needed something that had little movement, even less color variation, absolutely no shine, and wouldn't require tons of cutting and grouting.  The hearth happens to be 18" x 72", and if we use a 1/16" grout line between each of the four tiles we'll need, we should come in just about perfectly with no need to rent a wet saw.  Yessss!

We found the tile here.  After pricing it through some local vendors and realizing that 18"x18" tile ain't so easy to come by, we discovered that nine square feet of tile would run us about $100-- but from marblewarehouse it'll only cost $66 including shipping.  Even $66 seems sort of spendy for four tiles (actual tile cost is only about $30) but, as I've said, it'll save us on wet-saw rental and prevent us from wasting a bunch of tile.  And if we consider the total cost of the fireplace makeover to date, ($14: free leftover primer from another job, $4 for the paint samples I mixed together to paint the brick, $5 for the quarter-round that will eventually frame out the hearth, $5 for the patching compound) it doesn't seem so bad.  I mean, $14 to go from this:


To this:


means I've earned $66 worth of tile, right?


Wednesday, October 17, 2012

Totally Floored: Win Some, Lose Some

First (fail), a new sisal rug.  It came in the mail two days ago after an impulse internet purchase.  I've been feeling ambivalent about the priceless-antique-and/or-yard-sale Persian (see previous posts) that was camped out in our living room for several reasons: 

1) It's a bit too small for the space and sort of appears to be floating around the room.
2) It has a slight worn spot (read: hole) in one end, and I don't want my high-traffic living room to make the damage worse.
3) It's very traditional, and I'm not sure that's the direction I want to take in the living room in our little house in the Pacific Northwest-- it seems a little dressy for a place where "business casual" means yoga pants and Skecher's Shape-Ups.  Not that I want my house to look like the interior equivalent of yoga pants.
4) I really, really want it in my bedroom instead.

So this website was having a major sale, and I scored an ENORMOUS $500 rug for $160 with free shipping.  It obviously wasn't the most expensive thing in the first place, but I had high hopes that it would be slightly grayish, a little knobby, textured-- if not yoga pants, then a comfy-but-stylish sweater. 

What I got kind of looks like industrial carpeting:


And please don't mind the utter lack of staging, unless you count my water glass on the coffee table, Ray's on the side table, and my raincoat on the Windsor chair.

See?  It looks like a big ol' sheet of beige elementary-school carpet, except nobody would ever make beige elementary-school carpet because beige carpet is horribly stain-prone.  It causes the corduroy side chair (known to everyone in my family as "the gold chair"-- it'll get reupholstered just as soon as I teach myself how to reupholster chairs) to appear weirdly camouflaged.  What's worse, it arrived dirty-- the plastic sleeve it'd been packaged in was wide open on both ends, and the UPS man thoughtfully laid it down under our carport with one end of the rug laying directly on our (wet, dirty) paved driveway.   

So it must go back from whence it came.  We've already rolled it up.  Sigh.  On a positive note, we moved Grammy's Persian into the bedroom and I love it there.  Photos to come.

Second (win), Phase II of the fireplace project (Refinish Damaged Hardwood Floors) is finally complete.  It started when we ripped up the huge tile pad that had been installed over the original skinny hearth and about a foot of the wood flooring.  The wood looked awful, but we thought we might be able to salvage it.  Here's a flashback to my dad ripping up the giant tile pad:


Ugh, hard to believe the fireplace used to look like that!  Anyhow, here's a close-up of the floor after we cleaned it up some:
 

And a wide shot of the whole living room.  As you can see, it looks pretty rough:


After Dad pulled up the tile pad, I asked my mom's advice on how to repair the damage.  How would I ever find a stain that would match the rest of the flooring?  I mean, this house is 60-some-odd years old.  Without missing a beat, Mom glanced at the floor and said, "I'm pretty sure that's Early American."  Now, at this point I'm old enough to know that my mom is always right, especially where interiors are concerned.  So, realizing that no more research would be required, I bought some Early American.  And after some careful prep-- sanding, filling holes, damp-mopping, sweeping-- I applied a coat of stain.  My faith in my mother's omniscience was confirmed all over again.  See where I've applied the stain in the following photo?  PERFECT MATCH:   

 
(How in the hell she knew that, I'll never be sure.  But she did.  Magic?  When I asked her, she replied, and I'm not kidding, "Well, I knew it was too light to be Special Walnut."  The woman knows her stains.)

And so three days and three coats of polyurethane later we have just-about-perfect-looking hardwood floors in the living room.  If you know what to look for, you can still see a dark line on the floor on each side where the tile pad stuck out over the floor (it wouldn't come out despite all my sanding), but I'm pretty satisfied with the final result: 


See that stack of white marble subway tiles on the hearth?  We were going to use them there, but I think that's too much white.  On the hunt for 18' x 18" Montauk black slate instead.

Next step: leveling the hearth to ready it for tile.  Woot! 


Friday, September 21, 2012

Before & During (Part I of 736,824,061)

We've finally made some progress in most of our public spaces-- living and dining rooms, kitchen, laundry / utility / mudroom area.  The photos below are obviously not shot-for-shot before and afters for a couple of reasons: 1) it turns out I am AWFUL at taking pictures and can't seem to duplicate a shot even if I'm the one that took the original, and 2) these are not afters so much as durings.  We still have a lot of work to do in every one of these rooms.  So following each photo is quick rundown of what we HAVE done and a little bit about what's left to do.

We'll go about this as though it were raining (which it will be for about the next ten months) so you've decided to park under our carport and come in through the laundry room door.  Which, by the way, we do not encourage.

LAUNDRY AREA:

This is the inside of the door you just walked through ca. August 13, 2012.  To help you orient yourself a bit, the kitchen door is to your right and the third bedroom door is on your left.  You can see a bit of the tool-storage area on the left-hand side of the photo, and the electrical panel is just to the right of the photo frame.  It's dark and scary in here, no?  You're just about ready to run screaming from the house, but you don't for whatever reason.


Instead, you back up and take the long view of the same corner, though now the security door is just out of your photo frame on the left:

 Oh no!  Check out that ill-fitting plywood (see those gaps?  Is that safe?  You don't think so) into which the electrical panel is screwed!  This place is terrifying.  The walls are a lovely mélange of plywood, vertical paneling, and shiplap.

Fast forward to September 21.  The below photo is sort of a combination of the first two views, with just a few modest changes: 


What we've done:  painted everything obsessively, added drywall to the wall behind the electrical panel, gotten a gorgeous new washer-dryer which we could never have afforded but for my sister and brother-in-law, covered the tool-storage closet with a curtain.  

What still has to happen: the place needs ceilings-- the acoustical tile that's currently overhead is unspeakably ugly and actually missing in places, leaving the attic open to the laundry room.  And did I mention we have roof rats in the attic?  Yeah.  So just have to find out if our tiles are asbestos.  If not, we'll rip them down, avoiding showers of rodent crap, and drywall the ceiling.  If so, we'll pay someone else to rip them down.  And then drywall the ceiling.  If you look carefully, you can see I still need to caulk the top of the seam between the drywall behind the electrical panel and the wood paneling.  Obviously the ripped-up linoleum flooring is on its way out, to be replaced by 12"x24" peel-and-stick faux slate.  We'll grout of course.  What do we look like-- savages?

Before heading into the kitchen, you turn around to check out the other side of the laundry room.  Flashback to 8/12/12:


It's too horrible!  You close your eyes.  When you repoen them, you're back in the present day:


Remember to take the tag off that area rug before you photograph it again, you remind yourself.  And you turn around and head into the...

KITCHEN.  

Flashback:


Ew!  Everything about this must be gutted, obviously.  It is gross.  Those weird doorless shelfless cabinets-- who did that?  And there's no place to put anything in here.  Though you can't see it from this view, there are also no cabinet doors on the left side of the kitchen.  And that fridge holds roughly two bottles of hot sauce and a six-pack of Natty Light-- perfect for a college boy, but not going to work for someone who produces three elaborate meals per day.  The oven has no timer, and all the eyes are so tilted that your pots and pans slide off immediately.


Today:


Better, no?  Functional stainless appliances (made possible, as with the washer-dryer, by unbelievably generous gifts from our families) make this much more workable and a lot more attractive.  My IKEA Billy bookcases were relieved of their book-holding duties and brought in for some extra storage on either side of the stove.  

What still has to happen:  Um, everything.  New cabinets all around, new floors, new countertops, real baseboard molding, new light fixtures, blah blah blah blah fifteen thousand dollars. 

You head for the door at the far wall.  Well, now you're in the...

DINING ROOM.

You walk through and stand in the living room so you can get the full view in flashback mode:


Yep, that's what it looked like in July (obviously not our stuff).  Anyhow, you're standing in the living room, and you can see the kitchen door at the left of the photo, and out the french doors is the electric green lawn brought to you by the Pacific Northwest.  I don't really feel the need to say anything about this photo, except that I think that thing hanging on the wall on the right is a snakeskin, not... what it looks like.

And as of today:


Just got that table today.  I'm not sure I love it, but maybe once we get some chairs?

Still to do: install new light fixture, hang art, find chairs (preferably cool antiques).  Maybe a skinny dresser on the right-hand wall to serve as a buffet and store my kitchen and dining linens?  Thoughts?

You turn around to check out the progress in the...


LIVING ROOM.

Circa 8/10/12:


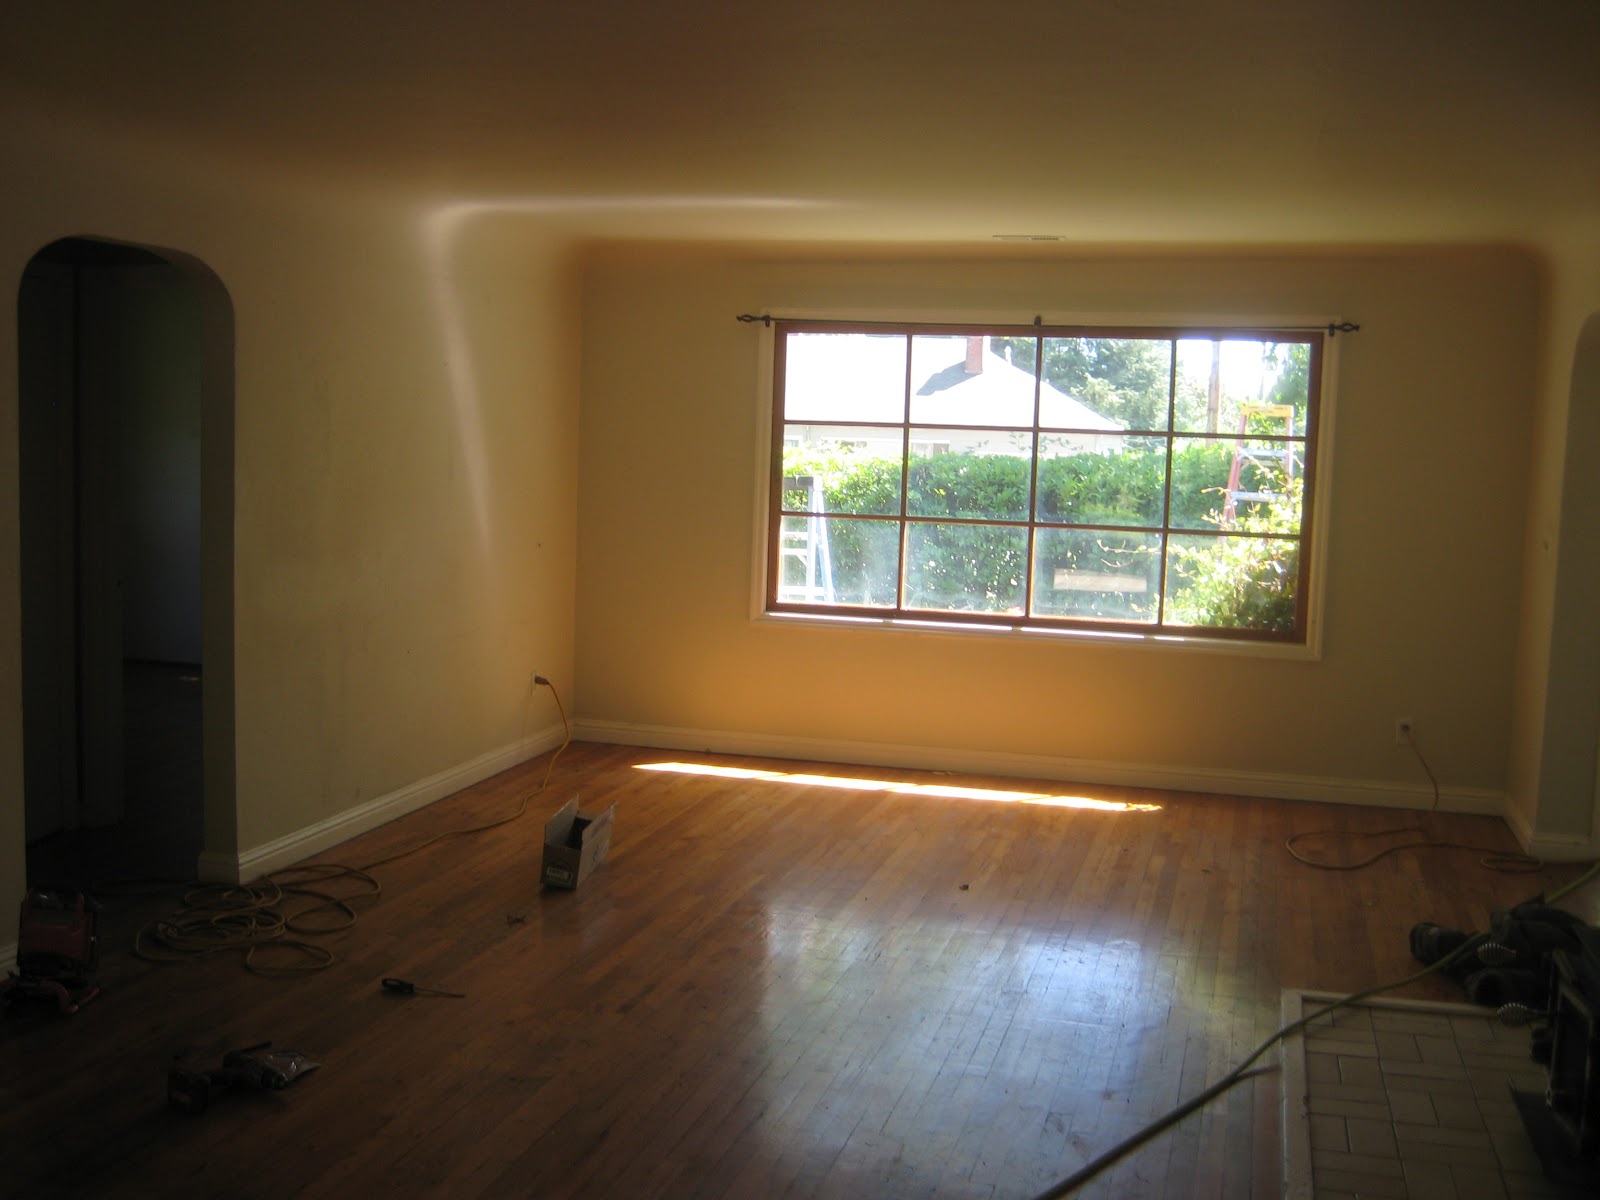
Left side, awful lighting.

Right side.

You're like, wait, why are those window mullions not painted?  Why is that gross woodstove jammed into the fireplace?  That tile is ugly.  Nice archways, though.  You close your eyes and flash forward. 

Combo view:


What we've done: painted the window mullions (ask my mom about that-- it took SO MANY coats of paint and primer because the wood has some sort of super-tannins that CANNOT be blocked by mere mortals, so Mom painted it for six straight days while Dad reno'd the bathroom), painted the fireplace, ripped up the icky tile, painted the walls and trim, added curtains (love you, $9/pair IKEA Vivan!) and hemmed them, hung a few things.

Still to do: hang way more things, make new throw pillow covers, reupholster the golden corduroy armchair my mom purchased new in 1983, tile fireplace surround, repair damaged wood floors.

If you're digging my old threadbare Persian, you can thank my grandmother, who has told us at different times that 1) it belonged to her mother and is a priceless antique, and 2) she herself bought it at a yard sale in the 60's.  I prefer version 1, so I'm going with that.  The rug is special to me anyhow-- if slightly too small for my space-- because it was in my parents' first house and also my sister's, and now it's come out to the West Coast to make my first house a home. 

Hope you enjoyed the tour!  You can just show yourself out the front door.  And while you're out there in the front yard, give Ray a high five-- he's probably digging up some bamboo roots, removing a massive hedge, rat-proofing, mowing the grass, etc etc etc even as we speak. 


Wednesday, September 19, 2012

Fireside Chat

In our idyllic little Pacific Northwest town, there are two kids of houses: the long skinny 1960's ranch with three tiny windows that are all jammed right up under the roof, and the kind that costs $600K.  We were looking for neither of those, so we knew we'd be unlikely to get anything else on our long wish list.  Forget the basement, forget the spacious kitchen, forget the master bath, the second story, the four bedrooms, etc etc etc.  One of the things we thought we'd probably have to live without was a fireplace.

Under the patient guidance of our awesome realtor, we looked at lots of houses.  We even seriously considered buying some of them, but each one had a fatal flaw. There was the cool mid-century modern house on the hill that was just way too big and expensive to update; the gorgeous craftsman located on a way-too-busy street; and my ultimate dream house, the 1944 Cape Cod with beautiful views that was literally sliding down the hill atop which it was perched.  We were about to offer on the groovy mid-century pad when one of our friends alerted us to the For Sale By Owner on a great street in a quiet neighborhood right by campus.  We went to see it right away.  

 When we walked into the living room, this is what we saw: 


So the place had some issues-- notice hatchets and guns hanging on the wall, cat tree (plus freaky evil-eyed cat in the foreground!), etc.  But there was a fireplace!  Granted, there was a woodstove stuffed into it, and and there was a huge white-painted wooden frame around the ugly tile the woodstove installers had used to extend the hearth.  I asked our realtor if he thought there was original hardwood under that gross tile, and he basically told me not to hold my breath.

Here's another view:

When we finally moved in, the awful woodstove was gone, and I had to know what was under the tile.  I got some good news right away: first, the tile wasn't glued directly to the floor as our realtor had feared-- it was sitting on some cement backer-board.  Dad (who-- mid-bathroom reno-- really wasn't busy with anything else, har har) ripped the whole thing up in one fell swoop...


... and now it's sitting on our back deck, where it keeps our charcoal grill from starting a fire.  

Underneath, as you can see, there was slightly damaged but definitely salvageable hardwood and a clear indication of where the original hearth had been.  Yesss!

So the three-phase game plan for the fireplace became:
1.  paint brick surround white
2.  refinish damaged wood floors
3.  tile with white marble subway tiles

Phase one is complete.  I'm making it sound really simple, but it actually required like 52 separate steps.  Bor-ing.  Here's the finished product:

 Blurry, I know, and the lighting is horrible.  Sorry.

Next up-- refinishing floors and tiling!  We know nothing about how to do either of those things, by the way.  Updates to come.